gallium, the weird metal

PICTURES COMING SOON

Gallium: a weird liquid metal in your hand! It’s as shiny and mobile as mercury but so safe… unless you’re a Coke can. It’s a liquid wire to carry electricity. It acts like ice on freezing. With a simple AAA cell you can make it take extremely different shapes. It’s easy and inexpensive to buy, for much fun.

Equipment and supplies: For many parts of this demo It depends on how many of the 6 parts of the whole demo you wish to do. Foremost, you need gallium ($14 or more; see below). Get some simple containers, cups or chemical beakers, to hold warm or cold water. Get a piece of glass (careful of the edges) or a glass bottle for demo 2. For demo 3 get an empty aluminum can and a piece of sandpaper. For demo 4 get a small, clear, rigid tube – glass or plastic. For demo 5 make a small trough, even in modeling clay, and get the use of an electronic multimeter ($10 or more) to measure electrical resistance. For demo 6 get a beaker, some sodium hydroxide ($10, or less if you pick the lye crystals out of some Drano carefully, not with bare hands), some wire, a piece of aluminum (maybe even a bit of aluminum foil), and a AAA cell.

Many of us, chemists and members of the general public, remember mercury, the liquid metal. You could pour it out, even onto your hand, as a beautiful, silvery, shimmering liquid. While you can still do that, people will look askance at you for the potential health hazard. There is such a hazard but almost solely if you let certain bacteria at it in oxygen-free environments to make astoundingly toxic methyl mercury or dimethyl mercury. So, avoid the problem and get some gallium. I bought some several years ago along with also fascinating bismuth metal, for a total of $55. You can get it from Luciteria.com, where you can get almost any chemical element! You can get 20 grams for about $14.

Demo 1: Melt it, even in your hand: The gallium will sit in the container as a silvery solid like any nice metal. However, warm it up a little and it melts. If you’re patient and your hands are not cold, it will melt in your hand. Its melting point is 30°C, which is 86°F. If you’re less patient, warm up some warm and insert the container.

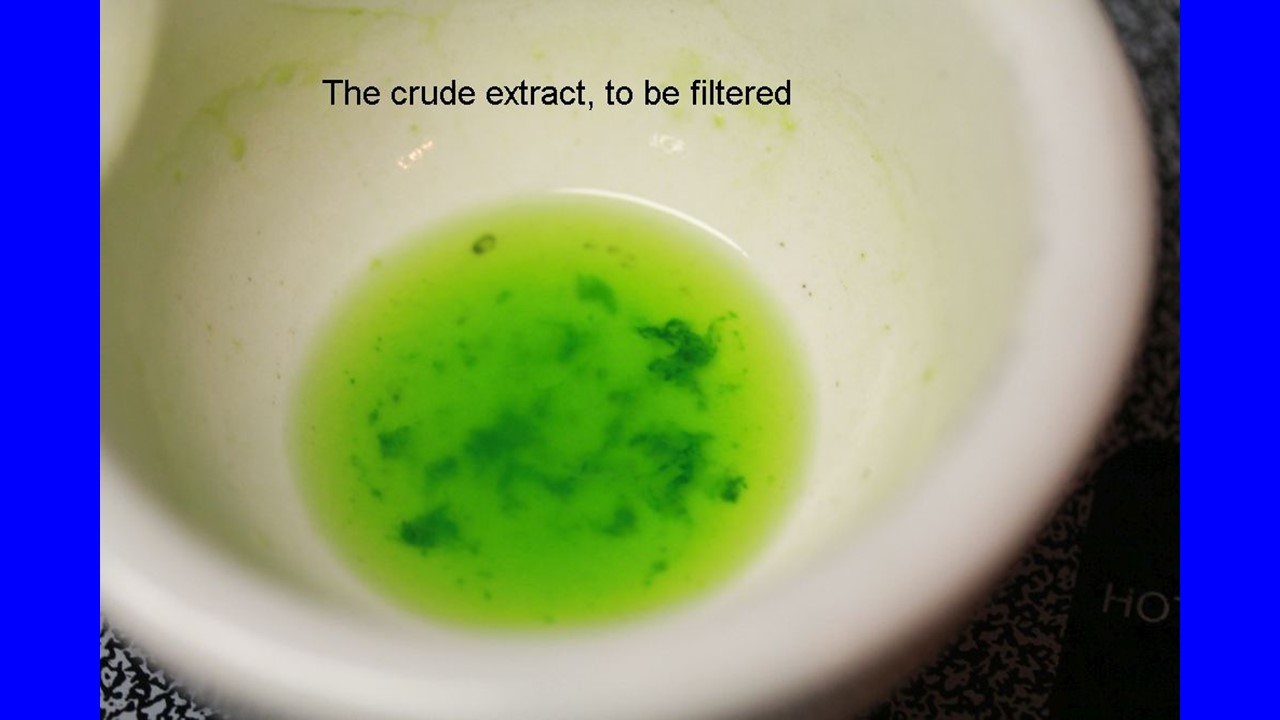
Demo 2: The shimmer and the streak: Carefully pour some out onto your hand. No worries. It’s essentially totally nontoxic. Roll it around and let it slosh around. Try not to spill any; it will leave a gray streak on lots of surfaces, even on your hand. The streak is readily washed off with a little soap and water. You can paint on glass with gallium, with a little practice. Get some gallium on your finger and rub it onto a clean glass surface. I did this on old wine bottles. Only a little suffices to create a fine, silvery mirror.

PICTURE(S)

Demo 3: Eating a coke can! Find an empty coke can or other aluminum can. Empty, I say, for reasons that become clear. Have your gallium liquid. Take a bit of sandpaper and scrape an area on the lid of the can. Deposit some liquid gallium on the area. Come back in an hour or two. The gallium will look odd and the can, more so. You can now push your finger easily through the lid! Gallium atoms have diffused into the aluminum metal, moving on their own just as a drop of food coloring diffuses slowly into still water. Gallium is a chemical analog of aluminum – it shares many of the same physical and chemical properties, but its crystal structure as a solid is spaced differently from that of aluminum. The presence of gallium pushes the crystals of aluminum apart, massively weakening the lid (yes, crystals, as are all solid metals in many small places). You’ll also notice that the decay of the aluminum lid extends well beyond the place where you applied the gallium; the diffusion kept going.

PICTURE

Demo 4: It’s slow to freeze and it does an odd thing: Gallium is one of the very few liquids that expands on freezing, just as water ice does. As also with ice, you can demonstrate this by putting a little bit of it as a liquid, a few grams, into a tube and letting it cool, say, in a bath of cool water. If you have a thermometer you can try baths of different temperatures. You’ll find that it takes a bath a number of degrees below the nominal melting point of 30°C for gallium to freeze. It will “supercool” and then suddenly start turning solid when you’ve pushed supercooling too far. The same supercooling phenomenon occurs in water. Some clouds have water droplets cooled far below 0°C. An airplane flying through such a cloud can collect these droplets that instantly become ice, and that’s usually a growing problem! Also, you can mark the tube at the height of the liquid and then see that it’s higher when the solid forms. The expansion of the liquid on freezing can create great force, as is readily shown by freezing water inside a metal container filled to the top (a soft drink so frozen has additional things going on, though it also explodes).

Demo 5: The liquid is a fine electrical conductor: Most metals conduct electricity much more poorly as liquids than as solids. The disorder of the locations of atoms in the liquid phase causes the electrons moving through it to scatter. They lose momentum and it takes more force, more voltage, to move a current. To see this, solidify some gallium in a “boat” shape – that is, some little trough with closed ends. Take a simple electronic multimeter that you’ve set to the setting of resistance (ohms, Ω). Touch the two probe tips to the two ends of the solid gallium and record the resistance in ohms. Now, melt the gallium in the trough by any handy means, even a hair dryer on low heat held at a distance so as not to splatter the liquid. When the gallium is liquid, repeat the measurement. It’s lower!

PICTURE

Demo 6: Gallium has a huge surface tension: When you put a drop of water on a surface that water doesn’t wet, such as clean glass or most plastics or some plant leaves, it forms into a ball, a bead. The attraction of the water molecules for themselves is far stronger than their attraction for the molecules of the surface. The best way to reach the lowest energy state is to stay as compact as possible, toward a spherical shape. That reduces the surface created. Surface tension is a measure of how much new force is needed to expose more surface. There’s a lot to explore in that concept. For now, let’s just note that gallium has seven times higher surface tension than water! Hmm. So why does it flow nicely over my hand? Well, when it’s exposed to air, gallium combines with oxygen gas in the air to make an extremely thin layer of gallium oxide, Ga2O3. Aluminum also makes an oxide layer, as you might expect from Ga and Al being in the same column of the periodic table of the chemical elements. Anyway, we can eliminate that layer.

Here we go: Get a chemical beaker. Pour in some water that is warm enough to keep the gallium liquid. Dissolve a bit of sodium hydroxide, known as lye, in the water. Do this carefully, since lye is corrosive and hazardous to human tissue (on your hand, it will first just make it slippery because it breaks down fats around your cells. Don’t leave it there. Don’t let it get to your eye! Wash it off; wash your eye with running water for several minutes if you get any lye in it. To continue, make a simple electrical circuit. Attach a wire to a piece of aluminum and suspend at least part of the aluminum in the liquid. Run another wire to the liquid gallium at the bottom of the beaker. Now, touch the two ends of the wires you have outside the liquid to the two ends of a 1.5 volt battery, such as a AAA cell. One of two things will happen. If you put the wire that runs to the gallium on the bottom of the AAA cell, you have made the gallium negative electrically. That chemically reduces the oxide coating to pure gallium. It then exhibits its maximum surface tension and really balls up. Now, switch the leads, making the gallium positive. It gets oxidized… .and it spreads out into fantastic shapes called fractals. It spreads even though the oxide coating is something of a restraint. The coating keeps getting dissolved by the lye, allowing the metal to spread!

Picture

End notes – some history: Where did the name gallium come from? The existence of gallium as a chemical element was predicted by the great Russian chemist Dmitri Mendeleev in 1867. He had data from the world chemistry community (hard to get in pre-Internet days!) about 48 chemical elements, including the relative mass of the atoms in each element. He put them in a 2-by-2 chart according to repeating properties. There was a gap below aluminum, so he boldly predicted there was a metallic element acting a lot like aluminum chemically with an atomic mass of about 68 with a density of 5.9 grams per cubic centimeter. In 1875 the fine French chemist Paul-Émile Lecoq de Boisbaudran used the relatively new method of spectroscopy to determine there was another, distinct chemical element in some metal samples. He purified it and there was gallium. It’s atomic mass of 69.7 was close to Mendeleev’s prediction, and so was its density of 5.91 grams per cubic centimeter. Being French, Boisbaudran honored his home country by giving the element a name derived from the Latin name of France, Gallia. Boisbaudran is also credited with discovering the elements samarium and dysprosium. His name is pronounced as bwah boh drahn, or more precisely in international phonetic symbols that I haven’t copied here. The “r” is lightly trilled and the “ah” is breathy.


colored flames

PICTURES COMING SOON

Flames in many colors: Just add the right chemical element and you can get red, orange, yellow, green, blue, or violet. Some of these elements occur in common household chemicals. A propane or butane torch, an old spray bottle, and some safety precautions and you’re good to go. There’s interesting quantum physics behind it all, too.

Many-colored flames

Equipment: a butane or propane torch ($15; be sure only a responsible adult handles it!); a selection of chemical compounds (some cheap, others pricey; I’ll note the safety issues, which can be handled readily).

This demo can be done as a short “Gee, whiz” demo, rapidly showing the flame colors. It’s far more interesting with all the context I develop here; I offer a lot of it here for fun and education.

We’ve all seen flames with different colors – the blue and yellow of a candle flame, some pure blue from a natural gas flame, deep red in a charcoal fire. Some of us have seen exceptional flames, such as burning magnesium (blindingly white, literally – never keep looking at it).

Getting new colors: We can look at what causes different flame colors. More than that, we can get many different colors in a flame by adding simple chemicals in small amounts. Take ordinary table salt, sodium chloride. Dissolve salt in some water. Put it in a small spray bottle (say, from eyeglass cleaner or nasal spray, cleaned out and dried). Set up the butane torch. Safety:

* Have an adult do this

* Be sure that the torch is very stable, on a table or desk; a torch knocked over can be a serious hazard.

* Have a fire extinguisher handy.

Get the butane torch burning nice and light blue. Spray the solution steadily into the flame about halfway along its length. You’ll get a vivid yellow! Why? To answer this we’ll talk about how electrons are running around in atoms (and molecules) and how changes in their states relate to energy, thus, to the color of light.

We’ll talk a bit more about safety of the chemicals at the end. First, please note that no one should inhale the spray! Toxicities are low but non-zero. There should be no problem with the small amounts sprayed into the flame and reaching the air in the room.

PICTURES

Why the colors appear: In chemistry or physics you learn that the atom has a tiny, very dense nucleus with a positive charge and a set of electrons of negative charge moving around them. The actual motion is complex and even beautiful while often simplified as the electrons moving in circular or elliptical orbits. The real patterns still retain the interpretation that electrons in an atom “at rest” occur at distinct or discrete energy levels. Let’s build up a sodium atom from a bare nucleus. We’ll need to eventually add in 11 electrons to match the 11 positive charges in the nucleus; sodium is thus chemical element number 11. The first electron ends up in an “orbit” or state called the 1s. One more electron can fit in this state, to give a atomic state we denote as 1s2, where the superscript “2” is counting those electrons. The next two electrons go into the state called 2s. Six more can go into three similar states all lumped as 2p. The eleventh and final electron goes into the 3s state. This is the state of lowest energy of the sodium atom in isolation… and that’s a common state for sodium that’s been wafted into the flame after the chloride partner gives back one electron to what started as a sodium atom missing one electron, an ion.

The flame is a state of high energy as disordered thermal energy or heat. Atoms and molecules in the flame bounce into each other with extreme frequency. Sometimes an electron on the sodium atom gets bumped up in energy from the 3s state to the 3p state. That’s not a stable state for various reasons. The electron can fall back to the 3s level. In doing that it loses a lot of energy. Ah, but energy is conserved! The energy is taken up in creating a particle of light, a photon. This photon, when it hits our eyes, gives us the sensation of yellow. There is an exact mathematical relation between the energy of the photon and its wavelength and, therefore, its color. (Light is a vibration of electrical and magnetic fields in space, as realized by the brilliant James Clerk Maxwell in 1860, and the idea carries into modern “quantum” physics, with interesting ties to the Nobel Prize for Albert Einstein! Light has a wavelength for its vibration, just as does sound or water ripples. There are lots of stories here.)

Let’s get some other colors: There are many metals that we can dissolve as salts and put into a flame. Each has its own electronic energy levels in both “ground” and “excited” states, and this gives their electronic transitions a special color. There may be several colors, with several transitions happening to

different atoms at the same time. To get nice, rather pure colors, we want the metal atoms to be combined with other atoms that don’t give another color to confuse the result. Many metals can be dissolved in, say hydrochloric acid to give chloride salts. Chlorine atoms don’t give light that we can see.

Let’s look at different metals, the colors they give, and the chemical compounds we can obtain and dissolve in water nicely. After this we’ll get back to the blues, yellows, oranges, and reds of common flames.

Element name Symbol Flame color Compound to use
Copper Cu Green Copper chloride or sulfate
Potassium K Violet Potassium chloride
Rubidium Rb Violet Rubidium chloride
Cesium Cs Blue Cesium chloride
Calcium Ca Orange/red Calcium chloride
Manganese Mn Lime green Manganese dioxide (see below) or nitrate
Lithium Li Deep red Lithium chloride
Iron Fe Orange Ferrous sulfate (ferric is insoluble)
Indium In Blue Indium chloride
Zinc Zn Aquamarine Zinc chloride or sulfate
Strontium Sr Red Strontium chloride or sulfate
Boron B Green Boric acid (borax is not as good)

The last element, boron, is not a metal, but it’s handy and it’s colorful, and the same ideas about electrons changing state apply. The particular salts to use, chloride or sulfates, are not critical; you might find some others, but avoid salts where the other part, the anion, imparts its own color that might mask the color you want. Obviously, avoid borates of the metals, or you’ll mostly see the green of boron.

Dissolve as much of a compound as possible. You’ll be using just a tiny amount sprayed into the flame, so you won’t waste much – and you can keep the solution and its solids for later, anyway. Some of these compounds are much more soluble than others. E.g., only about 6 grams of boric acid dissolve in 100 g of water, while 129 g of manganese nitrate will dissolve in 100 g of water! In any case, all the above are usefully soluble.

Getting these chemicals and using them safely: Some of these are easy to get and cheap, others are more specialized. Start with the easy ones:

* Copper: copper sulfate is sold as a root killer in garden or hardware stores (it kills roots that invade your oudoor plumbing. Cheap. Copper sulfate is toxic in fairly small amounts, even 1 gram. Don’t let anyone taste the pretty blue crystals!

* Sodium: this is ordinary table salt. Super cheap.

* Potassium: pharmacies and supermarkets sell potassium chloride as a “salt” substitute for people with high blood pressure. Make sure it has no sodium chloride at all, or the sodium color will dominate. Cheap.

* Calcium: Calcium chloride is sold in big bags to melt ice in cold climates. It is also sold in small amount, rather pure, for making some cheeses and can be bought online.

* Manganese is in alkaline batteries. You can cut an old battery open (careful with the sharp edges!). However, the manganese is as the insoluble dioxide. To make a soluble form, you can dissolve a pinch of the dioxide in a pinch of hydrochloric acid, HCl, also sold in hardware stores as muriatic acid (from the Latin muria, brine, since the chlorine is made ultimately from sea salt). BE CAREFUL; HCl is volatile, so that HCl gas wafts off the liquid. Its suffocating odor is a deterrent; its effect on lungs is terrible. Don’t breathe over it, and discard any leftover acid (in small amounts) by diluting it with lots of water.

If you can get ahold of manganese nitrate, you’re set, without any processing.

* Iron: You can get essentially pure ferrous sulfate as “iron pills” at a pharmacy or supermarket. They’re sold to treat iron deficiency in humans. Note: While iron is a critical element in our nutrition (usually obtained from food), an excess is toxic and even deadly, as it drives the destruction of organs. The most common accidental poisoning of children is from their naïve consumption of iron pills. Take care.

* Boron: boric acid is sold as a roach and ant killer. Get the pure stuff, not mixed with other chemicals. It is toxic to humans, too, at the level of a few grams. Don’t let anyone taste it!

The other chemicals are less available. Get your friendly local university chemist to give you a few grams, or have him or her do those demonstrations. You might also get them from a chemical supply house or Carolina Biological Supply.

Controlling the torch flame:

Why was the butane flame blue and orange to start with? Combustion of a hydrocarbon such as butane is a very complicated set of chemical reactions, all going on at the same time in a very short time as the butane and its products shoot out. The combustion is always a little bit incomplete, creating chemicals that have their own glow or luminosity. Very incomplete combustion, similar to that in a candle flame with its low temperature, creates balls of mostly carbon, called soot. When in a flame, they glow from what’s called blackbody radiation (the name has a long and fascinating history, even involved with Nobel Prizes). This is radiation of all wavelengths or colors. Its intensity rises with temperature. Its color changes with temperature, from red at low temperatures on up to blue at temperatures of stars, far higher than in any flame. To prevent the orange glow from masking the colors of the metals that you want to see, adjust the torch flame so it burns blue.

Finally, why is there blue in the torch flame? This color comes from some unusual and unstable chemicals forming in the flame. One such chemical is the radical CH, one carbon and one hydrogen bonded together. It’s very unstable and gets burned up eventually, but not before it glowed. Another compound is C2, just two carbons bonded together. Same deal – it’s unstable and it disappears, but it did glow on its way out.


spontaneous ignition

PICTURES COMING SOON

Spontaneous ignition: the powerful oxidant (potassium permanganate and sulfuric acid) reacts with ordinary ethanol to create a flame without a match. A more dangerous demo, done in a safe area at a safe distance, is nitric acid as the oxidant in a shallow dish. Have an adult do the whole demo.

Equipment and supplies: potassium permanganate ($$, where), concentrated sulfuric acid (get a small quantity, say, 100 ml; $XX), ethanol (get a small quantity of denatured alcohol, perhaps at a hardware store; $10), big beaker (400 ml is good, from a chemical supply house or Carolina Biological Supply; $5), 2 smaller beakers for the acid and the alcohol (50 ml each, $6), eyedropper

Precautions: foremost, only have an adult who knows chemistry to the demo. Have on hand baking soda (better: commercial acid neutralizing powder) to neutralize spilled acid; wear gloves, goggles, and a lab coat; prepare to wash exposed flesh with water copiously, as at a wash stand; run the demo on an acid-resistant counter. Concentrated sulfuric acid is an extremely corrosive liquid. It attacks flesh, even charring it if it is in contact form more than a few seconds. It also reacts vigorously with water. A dollop of water put into the acid creates so much heat that the water vaporizes into steam and splashes the acid around. Never add water to sulfuric acid; add acid to water, if you must.

On to the fun

We’re going to mix beautiful purple potassium permanganate with sulfuric acid to make a very strong oxidizer. When we drip ordinary alcohol onto it, the alcohol bursts into flame every time. We’ll look at why this happens.

Here’s the chemistry of it all: Potassium permanganate has the formula KMnO4. It has the most oxygens that can fit around a central atom and it can readily release those oxygens for a chemical reaction. Other compounds with so much oxygen are similarly powerful oxidants – perchloric acid (HClO4), osmium tetroxide (OsO4), potassium dichromate (K2Cr2O7) are among these.

Oxidation is defined accurately and inclusively as the extraction of electrons from a fuel. In ordinary combustion the chemical species that pulls off the electrons is oxygen. Since we’re considering the combustion of common alcohol (ethanol, C2H5OH) as the fuel, let’s look at the overall reaction of alcohol burning in air. The oxidant is then atmospheric oxygen, O2. All the carbons become carbon dioxide, CO2, and all the hydrogens become water. For complete combustion the summary is

To start this reaction at room temperature, we need a source of ignition. It can be the hot flame from a match. It can be a strong electrical spark. There has to be something that starts tearing apart some of the ethanol molecules into pieces that readily undergo further chemical reactions. The whole process of burning to CO2 and water is quite complex.

There’s more to it. The reaction only keeps going if the heat that’s liberated by burning some of the fuel is effective in heating the next “batch” of fuel. Liquid fuels such as ethanol spread out the heat well, so that it’s hard to keep the flame going unless the alcohol itself is warmed. You can’t make a flambé dinner entrée with cold cognac or rum as the source of alcohol.

This reaction is different. We have to add the very strong acid, sulfuric acid, H2SO4, which turns the potassium permanganate into the potent oxidant MnO4, a free proton H+, and potassium sulfate. The permanganate ion, MnO4, readily provides all its oxygens for oxidizing the alcohol, becoming reduced itself to the state called manganous; the manganous ion is formally written as Mn2+. We can look at it as if manganese started with 7 positive charges and ended up with 2 positive charges by taking up electrons from the fuel.

Running the reaction: We start with potassium permanganate on the bottom of the large beaker. A convenient amount is 5 grams; you can weigh it out on a small laboratory scale or you can just use ½ teaspoon. If the crystals are coarse, you should grind them to a powder, which is easy using a mortar and pestle (again from a chemical supply house, or even a kitchenware store). Make it aggregate into a pile rather than spread out over the bottom of the beaker, such as by tilting the beaker. Add a similar volume of the concentrated sulfuric acid. Take great care to avoid spills. It’s convenient to pour from the bottle of acid into a small beaker and then from the small beaker into the big beaker with the permanganate crystals. Don’t use too much acid or the reactive “paste” will be too diluted with acid, which is not the primary reactant.

Pour a few milliliters of ethanol into a small beaker. Draw a few ml into the eyedropper. Hold the eyedropper over the acid/permanganate paste and release a single drop. It will burst into flame. The permanganate ion reacts so rapidly with ethanol that the heat builds up very quickly, making the ethanol and acid mixture very hot. It’s akin to lighting a match. Aiding the rapid heat build-up is the sheer density of the oxidizer; the alcohol is exposed to all that oxygen in a small volume.

Connection to rocket flight: The reaction is termed hypergolic, or hyper-energetic, from the German hypergol. The erg in that word refers to work (Greek ergon), also construed as energy. Some rocket engines used hypergolic propellants that burst into flame on contact in the combustion chamber. That made engine starting more reliable. Modern high-performance rockets such as NASA’s Delta rockets, the Russian Proton rockets,, or the Space-X Falcon use “safer” fuels such as liquid oxygen and kerosene; ignition is done with technical expertise.

A note on color and physics: The permanganate ion is one of the most intensely colored substances known. It colors water a deep and beautiful purple, even at very high dilutions. Permanganate is an exceptionally strong absorber of light – almost all across the colors in the spectrum, leaving only a bit of the red and blue, making purple. Try adding a few grains to a beaker of water. Note that handling the solid with your fingers will leave you with a strong purple stain, which slowly changes to a rather permanent brown stain as the permanganate oxidizes your skin oils and becomes the insoluble manganous oxide. Wash off any permanganate stains quickly. The same staining will occur on other surfaces, such as your clothing; take care.


remotely relighting a candle

IMAGES COMING SOON

Relighting a candle, remotely, is simple to do, but the physics and the chemistry of it has some real details. Here’s the link for this simple but intriguing item.

Relighting a candle, remotely

Equipment: A candle; matches- that’s all… all in a room without air currents (no fans, drafts, etc.)

That it works is simple to show: Light the candle and get a reasonably good flame going, not a small one. You may need to let the candle melt a fair-sized pool around the wick and then pour out some of the wax (not on the rug or tablecloth!). You want a length of wick above the liquid wax to be a bit long, even a centimeter (a bit less than ½”). Snuff out the flame rapidly. I do this put closing my two fingers on it and quickly letting go; don’t encourage young children to do this, as they might get a small blister. You can use anything else that closes on the flame and opens again quickly, or even a very short puff of air, though it often defeats the effect. At least blow through a straw rather than starting a big movement of air with a breath. The wick will now emit a wisp of vaporized wax and the breakdown products of wax. Quickly have a lit match ready. Go some distance up this stream, which may even reach 4 to 6 cm (about 1-1/2 to 2-1/2 inches) in good cases. Move the match flame into the stream and the stream will catch fire. It burns back to the wick and relights it!

VIDEO and some frame grabs

How it works: Candle wax is a complex chemical mixture, mostly long chains of molecules made of just carbon and hydrogen called hydrocarbons. You can’t light wax just by getting a flame near it. You need to heat it until its molecules both vaporize and partly break down into small molecules. The candle flame is constantly doing that. The small molecules, especially when they are hot, readily catch fire. That’s what’s in the smoky stream. You can also see that a flame in a flammable mixture (the vapors and the air mixed in them) readily propagates from its hot end toward any further supply of the mixture – here, toward the wick (as well as upward, though that’s less obvious as you’re focused on the downward burn). The rate of spread of the flame is faster with higher temperature, though you can’t affect that very much in this setup.

Question to ponder: Why does the vapor trail from the extinguished wick stay together in a narrow stream? Why doesn’t it just spread out and become ineffective in letting the flame jump back to the wick? Let’s call the stream a self-organizing system. Its heat content generates a pattern of flow in the surrounding air that surrounds the vapor stream tightly and also helps move it up.

flash paper

MORE PICTURES COMING SOON

Paper that burns in a flash before it hits the ground: making flash paper with care: Take paper that’s really pure wood fiber (cellulose); react it with nitric acid to replace parts of the molecules; wash it and dry it. Put a match to it and it disappears in a rapid flash, leaving no ash. Make a flaming paper airplane! Dangerous chemicals, but it can be done safely. Here’s the link to the story.

Paper that burns in a flash before it hits the ground: making flash paper with care: Take paper that’s really pure wood fiber (cellulose); react it with nitric acid to replace parts of the molecules; wash it and dry it. Put a match to it and it disappears in a rapid flash, leaving no ash. Make a flaming paper airplane! Dangerous chemicals, but it can be done safely.

VIDEO, incl. new one

Equipment and supplies: High-quality paper without clay sizing to make it shiny – that is, white paper towels; scissors to cut the paper towels; a graduated cylinder (100 ml capacity; $12) is handy to measure out the acids; concentrated sulfuric acid ($20-44, from a chemical supply house or, say, Carolina Biological Supply); concentrated nitric acid (ditto); 3 shallow glass bowls, about 15 cm (6”) diameter (kitchen bowls are OK; they will not be harmed); pitcher of water; plastic tongs to handle the treated paper; a watch to time the treatment; an acid-resistant surface on which to carry out the treatment; protective equipment – see below.

Precautions: Only an adult with a good knowledge of chemistry should run this demo. both of the acids are dangerous, sulfuric especially so; it will cause severe burns to your skin, even charring it. It will corrode many surfaces. Treat sulfuric acid with extreme respect. It also reacts vigorously with water. If you add water to concentrated H2SO4, the water will get so hot that it flashes to steam, spattering acid all over. Never add water to sulfuric acid; only add acid to water, with care. Nitric acid by itself is not quite as corrosive but it will turn your skin yellow quickly. The vapors of nitrogen dioxide above the acid are very corrosive and damaging to your nose and lungs. Don’t breathe near the open bottle of nitric acid. The combined sulfuric and nitric acid creates the nitronium ion, some of which appears in vapor above the mixture. Never breathe near the reaction bowls, and be sure to have good air circulation. The mix of acids creates the nasty nitronium ion that appears above the bowl. Prepare for accidental spills; have baking soda, or, better, commercial neutralizing powder on hand. Wear full protection – gloves, goggles, and a lab coat. Have water on hand in good quantities to wash off any acids. All this said, with care the treatment can be done safely.

What we’re doing: We’re going to alter the cellulose molecules with nitro groups NO2, as internal sources of oxygen (and nitrogen) for really fast combustion – so fast that the flame spreads internally at high speed, maybe one second to burn up a square of flash paper 6 cm (2.5”) on a side. The details of the chemistry are added at the end of this write-up, for those of you who want to know.

Preparing the flash paper, which we can call cellulose nitrate or nitrocellulose. Sounds a bit like trinitrotoluene (TNT) with that “nitro” in there, doesn’t it? It should; it’s also a possible explosive, but don’t worry; that won’t happen in open air. The effect is still surprising.

* Get all your protective gear on, and the same for onlookers.

* Prepare the paper toweling: cut it into squares about 6 cm (2.5”) on a side. Keep them dry. Make anywhere from 3 or 4 to about 10 to 15.

* Set out 3 glass bowls and fill two with water.

* Have ready: the plastic tongs, a watch to time 2 or 3 minutes, and a bunch of paper towels that you’ll use to dry the treated papers.

* In one of the glass bowls, pour concentrated nitric acid into the graduated cylinder to about the 50 milliliters (ml) mark. The amount is not all that critical. Pour this into one of the glass bowls. This must be the first acid put in; it cannot be the sulfuric acid.

* Use the graduated cylinder to measure out about 50 ml of concentrated sulfuric acid. You could be very attentive and use a new graduated cylinder or else clean and fully dry the one graduated cylinder, but it won’t matter. Pour the acid into the bowl with the nitric acid – slowly, and letting the mix cool if need be so that it won’t boil.

* Here’s the repeated treatment:

* With tongs, slip a single square of paper towel into the acid mixture.

* Let it sit for 2 to 3 minutes, then use the tongs to take it out, letting the acid drip off as much as possible.

* Slip the treated paper into one of the bowls with water. Move it around for about 15 seconds.

* Move it to the second bowl and do the same. Now it should be pretty well rinsed of acid.

* Dry the paper square well between folds of a big square of paper towel.

* Remove it from the paper towel and let it air-dry.

* You can speed up the process with a hair dryer or a warm electric hot plate, but you may get a real surprise: it may flash into nothing before your eyes if you get it too hot, and “too hot” is still way below what sets ordinary paper to even charring.

The ignition: You can do this lots of ways. You can hold the flash paper with tongs or tweezers or whatever and light it at the far end of the square. The burning will be very fast. You can’t let it go from the tongs fast enough that it will hit the ground before it finishes burning. Like some magicians, I like to hold the flash paper by finger and thumb at a corner and then have someone with a match light the match and touch it to the far corner. I let it go as fast as I can and the paper finishes its yellow flash after it has dropped only a foot or so! Note that you can get a hot finger if you wait too long to let it go. However, the mass of burning matter is very small, so you are unlikely to get any notable burn. Be warned, however. I know how to do this, and you may find you need some practice after watching an expert. We’ve also folded the square into a tiny paper airplane. We’ve lit it from the front and thrown it forward as fast as possible. It makes a show that we’ve caught with a high-speed camera. The image is fuzzy, with very low spatial resolution. We made it with a Casio Exilim Z-10, alas, no longer made. It can do 1000 frames per second! Even 240 frames per second is good, if you get some SLR cameras or a Go-Pro.

VIDEOs again

The chemistry

Cellulose is a polymer of the ordinary sugar, glucose. That is, glucose molecules link up end-to-end with the elimination of a water molecule at each link, making a strong and stable molecule (so stable that only bacteria digest it; even cows need bacteria to do it for them). Cellulose can burn, as in a wood fire, but slowly. Lots of oxygen has to reach it from the air to carry out the full combustion reaction, and that’s rather slow compared to what we’re going to do. We can write the chemical formula for cellulose as (C6H10O5)n, where the ”n” means that it’s repeated “n” times; the number “n” is in the tens of thousands.

The “stick formula” for cellulose, which doesn’t show the real spatial orientations of the atoms but which shows who’s connected to whom is

The reaction for combustion in air we can write for each set of two subunits as

We’re replacing many or most of the hydroxyl (OH) groups sticking out, 3 per glucose, with nitro groups:

The reaction occurs at each OH group. Now we have a lot of oxygen in the molecule, plus some nitrogen, which also liberates a lot of energy in the final reaction.

The final molecule looks like this

Hold on: the sulfuric acid doesn’t appear in the product. What is its role? Foremost, it strongly ties up the water molecules generated by the reaction of nitric acid. That prevents the water from accumulating and discouraging the continued liberation of more water. The very high acidity of sulfuric acid also activates the nitro group in nitric acid to chemically attack the hydroxyl groups of glucose.

Now the formula for its combustion can be written in two ways, though the reaction is some mixture of the two paths. If there’s lots of air with oxygen around, the carbons all burn to CO2 and the hydrogens all burn to water; that releases a lot of heat energy. The nitrogens combine with each other to make the strongly bonded N2 molecule, also releasing a lot of energy. We can write the reaction, per 4 units of glucose, as

If nitrocellulose (what we’ve made) combusts with no outside oxygen, there’s only partial oxidation of carbon to CO2, the rest ending as carbon monoxide, CO. That’s still a big energy-producer; the triple bond is the strongest bond in nature. The whole reaction looks something like

Reality is messier. We rarely get full conversion of the OH groups to nitro groups; the reaction of “self-combustion” will not go exactly to completion, possibly leaving minor chemical species, even H2. In any case, we get a fast reaction in air, and a real explosion in a closed container.

a candle on and off

PICTURES COMING SOON

Air, not air, and super-air: how does a candle burn in air, carbon dioxide, and pure oxygen? It’s easy to create these three different conditions and learn a bit of chemistry. If you have a vacuum chamber you can even fine tune the combustion.

Air that’s not air: extinguishing a candle, or …:

Equipment: a candle, and matches or a lighter to light it; a cup (optional) to put it into; another cup for mixing; baking soda; and vinegar. For an option you can also get some hydrogen peroxide and an old alkaline battery (cell).

How candles burn: Chemicals that allow burning of common fuels and chemicals that don’t: We light a candle and the flame on the wick heats up the wax around it, even making into vapors. Those vapors are composed of the elements carbon and hydrogen, both of which readily combine with oxygen when they are hot enough. (I put the chemical equation at the end, so as not to interrupt the narrative here.) Ordinary air has 21% oxygen when dry, 78% nitrogen, and 1% argon, a noble gas (very loath to react with any other chemical). Water vapor dilutes these a bit, up to about 6% in the most humid livable conditions for us humans. Candle wax, and most things we think of as combustible, don’t react with nitrogen in the air, but, hey, there’s enough oxygen for most fires that we want… and for our “controlled fires” in our bodies, our respiration that’s done with the help of many proteins in our cells. That’s another very detailed story that I won’t go into here.

Carbon dioxide is a gas that looks just like air, that is, transparent, invisible to the human eye, even if it’s extra-visible in the infrared that we can’t see. It’s present in ordinary air at generally low concentrations. Averaged around the globe it’s at about 415 parts per million in free air. In a closed room just our breathing may raise it to several percent; it had better not reach 10% or we can die from a few discrete effects on our bodies. Our breath is about 2% CO2. If we hold our breath we can get it to about 20% CO2, not a great idea to keep doing. CO2 does not support the burning of candle wax. In fact, it’s one of the final products of burning candle wax, the other part being water vapor.

The set-up: Basically, we can make pure CO2 readily by reacting common household chemicals, vinegar and baking soda. We can collect it in a cup and then pour it onto a candle. It can collect because it is denser that air and sits at the bottom of the cup. Its molecules weigh more (have a higher mass) than air molecules. So, light the candle. In a cup, say, a coffee cup, put some baking soda in it; use about ½ teaspoon; even ¼ tsp is enough if you’re careful. Slowly pour in about a tablespoon of vinegar. The mass will foam; don’t let it overflow. Let the bubbles pop. You might cover the cup with a piece of paper to avoid losing too much CO2 to air currents in the room. Now carefully hold the cup over the candle flame, safely high enough not to get burned or to burn your cup if it’s paper. Tilt the cup reasonably quickly to let the CO2 fall right onto the top of the candle flame. It will go out, because CO2 won’t support combustion.

PICTURES

Variations: First, put the candle into a cup that is, say, a few cm (an inch, plus) taller than the top of the wick. Instead of pouring the CO2 directly onto the wick, pour it into the cup that’s holding the candle. Do this slowly, so that the CO2 will rise as a layer. When the CO2 reaches the height of the wick the flame will go out. Of course, you won’t see the CO2 but you’ll see its effect when the candle flame goes out. Second, try adding more oxygen instead of replacing oxygen. There are several ways to do this, but BE CAREFUL. An easy one is to pour about 5 milliliters (a teaspoon) of common hydrogen peroxide solution into the mixing cup. Open a packet of dry yeast and sprinkle some into the hydrogen peroxide. The enzyme catalase in the yeast cells will cause a huge release of pure oxygen gas. Pour it onto the candle flame, very carefully – the flame will rise higher and hotter, so keep a decent distance above the flame. The rate of combustion increases with the concentration of oxygen, as this shows.

There’s a way to decrease the amount of oxygen available to the candle flame in any amount. We can put the candle into a vacuum chamber and slowly draw out the air. That demo is described in a bigger demo about using the vacuum chamber.

The chemical equations: For wax burning in the oxygen in the air: the chemical makeup of candle wax is closely CH2, in units all joined together into somewhat long chains. Let’s look at just one unit:

A couple of things: First, there’s that water on the side showing the results, or products of combustion. Second, note that I use what is called an improper fraction, in which the numerator is bigger than the denominator. That’s almost the universal practice in science. It’s so much easier and less prone to error than using two-part proper fractions such as 1-1/2, when you multiply or divide numbers. Third, the fraction is a fraction of “jillions” of molecules; there are no half molecules. The number of molecules in, say, 1 gram of wax (about 1/5 of a teaspoon) is greater than ten to the 21st power, the digit 1 followed by 20 zeroes. The number of oxygen molecules involved is much greater.

What’s happening with hydrogen peroxide? That’s H2O2 – water with an extra oxygen atom in each molecule. It’s prone to break up and give up that oxygen:


a chemical changes color with temperature

PICTURES ARE COMING

Hot = blue, cold = pink. How does that happen in a simple solution? The metal cobalt dissolved as an ion can take on different colors. It depends on which other ions surround it. We can change that by adding acid or adding water… and, surprisingly, just by warming or cooling a balanced solution. Get ready for some chemistry and a story about energy.

Change a solution from pink to blue and back – just cool it or heat it

Equipment and supplies: Here is a pictorial list

Costs: Labware is something you’d like for many demonstrations and experiments: small balance (properly called a magnetic force balance or scale; $20); weighing paper ($3; use smooth paper, in a pinch); beakers, in several sizes ($5 each); test tubes in one or more sizes ($1 each); test tube rack ($5); graduated cylinder ($10; get glass, not plastic); pipettor ($100, with tips; very useful; in this demo you can just pour carefully, but it’s tedious); tongs for test tubes ($2); hot plate ($80 or more; get a stirring hot plate and some Teflon-coated stir bars); thermally insulating gloves ($12)

Specific to this experiment: cobaltous chloride ($21 at Carolina Biological Supply for 100g, which is a lot)

Precautions: Cobalt compounds are toxic, so don’t expose yourself to them; they can be absorbed through the skin; use gloves. Hydrochloric acid is very corrosive, and the gaseous form of HCl is very noxious and can damage your lungs and eyes. Take care with the heated solution and especially with the hot plate. Have an acid neutralizer such as baking soda handy to take up acid spills.

Picture of two states

Many chemicals have intriguing colors or beautiful colors. There’s the deep purple of solutions of potassium permanganate, the violet sheen of iodine crystals, the gold of iron pyrite. Most colors are unaffected by temperature, but here is a fascinating and instructive case.

The chemical state of metal atoms in solution: Most metals can be nicely dissolved, especially in acids. The atom of the metal loses one or more electrons, becoming a positive ion; one electron lost 🡪 singly charged ion, such as the sodium ion, Na+; two electrons lost 🡪 doubly charged ion, such as the ferrous ion, Fe2+, or, for this demo, the cobaltous ion, Co2+. Many metals have multiple possible state, including cobalt as the cobaltic ion, Co3+, which we’ll leave here.

We often look at metal ions in solution. They must be accompanied by positive ions of equal charge in the whole solution; it’s possible to calculate the force of electrical repulsion if the charges aren’t balanced, and in a tiny amount of solution the forces are akin to nuclear weapons. In aqueous (watery) solutions, the Co2+ ion gets surrounded by a number of atoms or molecules. Some are right on the ion, as things called ligands (“tied”) and others sit outside this coordination shell as counterions that balance the total electrical charge to zero.

Ions moving between two states: In this experiment, we put the ion in a solution with chloride ions. There are two well-defined states. In one of them, which we can call water-complexed, the surrounding molecules are all water molecules. We write its formula as [Co(H₂O)₆]²⁺. It has two positive charges, so that there must be two negative charges right outside – in our case, as two negative chloride ions, Cl. The other state has four negative chloride ions on the cobaltous ion. We write it as [Co­Cl4]²⁻. It has two negative charges, so that there must be two positive hydrogen ions right outside, (overly)simply written as H+.

We got all this stuff into solution by dissolving cobaltous chloride in water and then adding hydrochloric acid. We’ll play with which ligands, water or chloride, get preference around the cobalt, by adjusting the concentration of acid and the temperature. Cobaltous chloride comes with water attached, as CoCl2◦6H2O. We add hydrochloric acid, HCl, in the right amount to get the cobaltous ion poised between its two states. (Side note: hydrochloric acid is properly the solution of the gaseous molecule HCl in water, but we’ll use common shorthand.)

Making the solutions: Fill a graduated cylinder (tall container with volume markings) with pure water to the 40 milliliter (40 ml) mark. Pour it into an ordinary beaker (that’s the straight-sided cylindrical container with a pouring lip). Weigh out 4 grams of cobaltous chloride and add it to the water. You’ll get a rosy red solution. Label it as, say, Col2, for short, and also label it as toxic. [The 4g here would be enough to make an adult quite sick and could kill a very small child. As all organisms, we need cobalt in the form of vitamin B12 but a tiny excess is harmful.] Now measure out 60 ml of concentrated hydrochloric acid, CAREFULLY. HCl is dangerous and must be handled with great care. It is not simply an acid that can corrode things. The HCl gas coming off the acid solution is suffocating and quickly damaging to lungs, eyes, etc. Do not breathe near the solution. Add the HCl to the cobaltous chloride solution. You’ll get a nice violet solution. Divide this solution into 5 or more test tubes for a series of demonstrations.

Demo 1: Swapping water or chloride ligands for changing colors: Take two test tubes that each have some of the original solution. Drop water into one solution and swirl it well to mix after each drop. Keep adding water. At some point the solution will turn a definite pink. You’ve now created the water-complexed state as the dominant form. In the other tube add drops of HCl with mixing. It will eventually turn a definite blue, with cobalt in the chloride-complexed state. You can reverse the effects. Add HCl to the first tube and you’ll eventually get it to turn blue; add water to the second tube and you’ll get it to turn pink.

PICTURES

Demo 2: Balancing the complexes and pushing them to one side or the other with temperature: Fill a beaker with the original solution and add HCl dropwise with stirring until you get a nice intermediate violet color (if you overshoot, add a little water). This solution will be very sensitive to temperature. Divide it roughly equally into three test tubes. Prepare hot water, to boiling, in a beaker on a hot plate. Beware of getting your hands in the “steam” above the beaker. Also prepare ice water in another beaker, just by adding ice to water. Now place one test tube in the hot water, holding the tube with tongs or with waterproof thermally insulating gloves. It will turn blue, the color of the chloride-complexed cobaltous ion. Put another tube in the ice bath. It will turn pink, the color of the water-complexed cobaltous ion. Of course, you could do this with one tube, but it’s nice to see all three colors at the same time as a clear demonstration of the changes.

Move the cold tube to the hot water and the hot tube to the ice bath and they’ll both reverse their colors! You can keep reversing them.

PICTURES

What’s happening in demo 2: Both water molecules and chloride ions are hanging around the Co2+ ion in the solutions. Both bindings are happening all the time. At any constant temperature there will be a balance, an equilibrium with each state forming and breaking up. Which one dominates depends on the temperature. When chloride ions dominate, more energy is released as heat than when water molecules dominate. If we add heat by increasing the temperature we are counteracting the release of heat, pushing the balance or equilibrium back toward the original side. The counteraction of this chemical shift on the force or perturbation we apply is described as Le Chatelier’s Principle. We can look at the reversible process of changing which ligands are on cobalt as this balance or equilibrium:

Pink side: [Co(H₂O)₆]²⁺ +4Cl⁻ ↔ [Co­Cl4]²⁻ + 6H₂O₅ + liberation of heat: Blue side

The two-headed arrow indicates that both forward and backward changes occur.


adding up colors

MORE PICTURES TO COME

Adding up colors: We’re all used to mixing paints or crayon colors and getting darker and darker colors. Adding colors gives us a very different experience, and we only need three different colors, red, green, and blue. This happens all the time in digital displays; there are simple ways to see this in near-microscopic detail. We can also make our own color mixer, or color adder, with three LEDs.

Let’s mix colors, both adding and subtracting them

Color perceived as a mix of three primary colors: We humans mostly have three different color-sensing cells in our eyes, in our retina. Each one responds to a different range of colors (wavelengths) of light. You can think of them as responding, very broadly, to red (one type of cone), to green (another type), and to blue (the third type). We get a certain mixture of “colors” in light as it is emitted by various sources – the sun, a lamp, … – and possibly reflected or transmitted by various surfaces – a leaf, a colored windowpane, … Our brain interprets any given mix of colors of light as a particular overall color or hue. We all know the experience and we may know a lot of different hues by name. There is also value or lightness, denoting how bright overall the light us, and there is saturation, denoting how diluted the color is by mixed-in white, such as pink being a mix of pure red and some white. There are some tricky parts, explained in a number of books or websites, such as hues looking different depending on nearby hues in a scene, but let’s leave that here. In any event, we can create a color as a hue, a saturation, and a value by getting three different pure color sources – red, green, and blue – and adjusting the brightness of each. Again, there are tricky parts because sources with very narrow bands of color miss some features – it’s why some color prints can’t be made to look exactly the way they appeared to our eyes; that, too, is another story. Here, we are going to see how three different colored light sources can make a great range of colors.

Short notes: Some people lack one or more color receptors. We call them color-blind, or, more appropriately, color-confused. They see all the colors but they seem different; some of them mix up greens and reds, for example. Some people have had their corneas – front of the eye – removed surgically, and they see ultraviolet light that the rest of us don’t. Bees also see ultraviolet. The mantis shrimp has 13 different color receptors but only sees a small range of hues; a lot of the receptors register other properties of light, including its polarization (more on that in other demos or experiments).

Several methods of adding colors: Adding colors is done all the time in a digital color display, though it can be hard to see it happening, so, let’s mix them under our control, with three (or more) ways of doing this:

— Lighting up 3 light-emitting diodes (LEDs), one each of re, green, and blue. We can vary the relative brightness of each LED to create different colors. For some of you, it may seem counterintuitive that adding red, green, and blue light makes white, while mixing red, green, and blue pigments as paint or as crayon streaks makes black, or nearly so depending on the crayon and paint exact colors. We can build a color mixer from simple electronic parts and a supporting box. We’ll get to the details below.

— Watching a color monitor of a computer add up colors from its many small picture elements, or pixels. Viewed from a normal distance, the colors from individual red, green, and blue (RGB) pixels blend in our eyes to make any specific color. We’ll need a camera with a close-focusing or macro lens to be able to see the individual pixels, which have to be quite small.

— Browsing to a website such as http://www.cknuckles.com/rgbsliders.html, where we can use our mouse to set the levels of R, G, and B light on a big square in our monitor.

First method: adding the output of 3 LEDs:

Equipment: We’ll build a small box with the LEDs, a battery for power, and controls for the level of output of each LED, with a small area where we view the colors mixing. We need:

* One each of a red, a green, and a blue LED, all of comparable light output at maximum. There are many places to buy these. For these and for all kinds of electronic parts, I recommend DigiKey.com. Get LEDs that have a peak current of 20 to 40 millamperes (mA). You’ll use the battery, below, to create currents to light them up, and electrical resistors to control just how much goes though each LED – that is, how bright each one is;

* A 9-volt battery and associated stuff: a “lead clip” that snaps onto the terminals to provide two wires you can attach to the rest of the circuit, and a handy clip to hold the battery to the box you’ll build; it simply snaps about the battery body;

* A resistor of fixed, low resistance for each LED, to limit the peak current so that you won’t burn out your LED. Suppose your LED has a peak current I of 20 mA or 0.020 amperes. The red LED has a voltage “drop” of about 2.2 volts, just to start current flowing (and it varies only a little with current). That leaves 6.8V to drop across the resistor. From Ohm’s law (which you can look up, if it’s not familiar to you), the resistor you need has the value R0 = V/I, or 6.8V/0.020A = 340 ohms (symbol Ω). It’s not critical to have that exact value, so choose common and very inexpensive 330 Ω resistor. It will have little current through it to heat it up, so you can use a low-power resistor, 1/8 watt or ¼ watt, though any power rating will work if you have a resistor handy. For the green LED, the voltage drop will be about 2.8V and for the blue about 3.3V. You can use resistors for these with slightly smaller values, but it’s not critical;

* A variable resistor or potentiometer for each LED, to vary the current. You want its highest resistance to limit the brightness to, say, 1% of maximum. So, you need a potentiometer rated at 100 times higher resistance, or about 33,000 Ω. You won’t find one for sale, so pick one that’s relatively close – say, 50k Ω (kilohms). There are several kinds of potentiometers that vary in “taper,” which is how rapidly or in what pattern the resistance varies with the turn of its dial. A convenient taper is called audio – it starts changing slowly and then more rapidly as you move the dial. The proportional increase in resistance is about the same along each fraction that you turn the dial. This will make the changes in brightness fit the sensitivity of our eyes. We notice relative changes in brightness, not really absolute changes. This will make the effects very clear;

* An on-off switch for convenience, as an alternative to pulling the lead clip off the battery each time to shut it down (and an alternative to leaving the color mixer on and running down the battery). A simple single-pole single-throw switch will work. Single-pole means that we are only going to control one wire, as the circuit diagram will show. Single-throw means that there is only one on-position and the other is an off-position. Be sure to get a toggle switch that stays in the position you want; there are also momentary-contact switches that revert the moment you stop pressing them;

* A set of “hardware” to mount all this stuff – particularly a nice clear or translucent plastic box to hold everything and a piece of thin, stiff, insulating board (“perfboard”) on which to mount the LEDs and the resistors. A full list is at the end;

* A piece of thin, diffusing plastic to “mix” the lights on a space you’ll use to observe the results;

* Some side-cutters, pliers, solder, and a soldering iron to make all the connections. Side-cutters let you cut wires and the leads of the resistors and the LEDs to handy lengths. They can also be used, with some skill you readily acquire, to strip insulation off the battery clip leads; otherwise, use a small, sharp knife with care. Needlenose pliers are handy for holding the LED leads while you solder to them. They act as “heat sinks” to much reduce the heat going into the LED and possibly damaging it. It’s handy to tie their handles together with a stiff rubber band so that the jaws stay clamped and the whole setup is stable while you solder. Learning to use a soldering iron is a handy skill. Be prepared to get a small burn or two, almost as a right of passage.

The pictures here show stages of assembly. There’s also a standard schematic of the electrical circuit. Getting familiar with conventional symbols is very useful

Using the device: Hey, play with it. Change the amounts of each LED’s light output and look where the light patches overlap. You can readily see that mixing approximately equal intensities of red and green gives us an even brighter yellow. Mixing red and blue gives us a pretty magenta, or a reddish or a bluish version of magenta. Mixing all three colors gives us an approximate white. I say “approximate” because the colors of common LEDs don’t quite fill in all the color space. In any event, this is an inexpensive device that is handy for demonstrations.


Method 2: looking at a color monitor on a computer to see the tiny colored pixels that blend in our eyes

Equipment: There are several ways to do this. I’ll present one that I found handy. Needed: a computer displaying colors in any desired pattern on its monitor ($0, if you have a computer; I assume you do, since you’re likely reading this on the screen); a digital camera such as a single-lens reflex or a newer mirrorless camera. You’ll want one that displays what it is seeing on an LCD screen on its back; a macro lens that lets the computer focus very close on a small area of the monitor. I use a Canon 60mm macro that will go to an enlargement of 1-to-1 (some macro lenses do much less, such as 1-to-5 even; you’ll want at least 1-to-2).

How to see the pixels: Pixel, is, of course, short of picture element. The computer monitor is covered with a million or so pixels. Let’s look at some in detail. Get an interesting color-varied display on the monitor. I put a hard surface such as a clipboard on my laptop computer’s keyboard so that I won’t be pressing keys and going off-scene. I set my macro lens to focus as closely as possible; that gives it 1-to-1 enlargement. I put the camera on the clipboard and click the control that shows the camera image on the camera’s back screen. Then I move it closer or farther from the screen so that the pieces of the screen, the pixels, are in focus. If you do the same you’ll see a grid of many very small and tall rectangles. Push the control on your camera that lets you magnify the image. Zow! You see all the patches of red, green, and blue that make up the monitor screen. You may want to save the image by taking the picture. You can move the camera around to various parts of the scene on the monitor that differ in color, hence differ in how much the red, green, and blue pixels light up.

PICTURES or video

How pixels work: On my laptop monitor there is just a repeating array of red, green, and blue pixels across the screen horizontally, with about 766 arrays stacked on top of each other vertically. Under commands from the graphics card, each red, green, or blue pixel is allowed to pass a fraction of the white light behind them. The balance of R, G, and B determines the color. Note that the pixels are not like LEDs; they do not actively emit light. They only passively pass part (or even all) of the white light behind them. Each pixel has its own precisely made color filter behind it… a better match to the R, G, and B of our visual cones than is the set of colors of the R, G, and B of the LEDs in the first method. The way that the pixel light transmission is controlled is shown brilliantly in a video by the Engineer Guy, XXX, as he takes apart a computer monitor. It’s well worth watching, more than once. To continue, at our normal viewing distance from the monitor the pixels’ light all blends into one part of our visual image, so that our eyes – and our brain – interpret the mix as a specific color, a hue, a saturation, and a value.

Method 3: find a website that lets us set the RGB color mix in a big patch on the computer screen

Equipment: Just your computer. Navigate to http://www.cknuckles.com/rgbsliders.html . You’ll see three “sliders” that you can drag with your mouse to set any level of R and G and B

CAROUSEL

Play with it. Of course, you don’t get to see how the individual pixels light up, but you can have a lot of fun wit the colors. You’ll see advertising claims that monitor model X can display 16 million or so colors. It can display that many different mixes of RGB colors (though maybe not fully reliably – a slight voltage change might make a 1% change in all intensities, which is about the same as smearing out 3 of the 256 different levels of each R, G, and B pixel). Human vision is not that finely attuned. We can discriminate about 20,000 colors, and, among these, maybe 200 different hues, the rest of the variation being in saturation and value. Some people say we can see 1 million colors; don’t count on it, and we don’t need it; we have very rich color vision, in any case!


Chlorophyll’s magic

MORE PICTURES TO COME

Green, green chlorophyll – it glows red (it fluoresces) and that’s a tell-tale for how active a green plant is…even across the globe seen from space. With an inexpensive violet laser pointer you can explore quite a bit about this very unusual molecule. Try this both inside the leaf and outside the leaf. Here’s the link for interesting times with green stuff.

Fluorescent color from chlorophyll, and a lot of insight into photosynthesis

Equipment and supplies: simple, fairly cheap ($12 to $40, depending on your kitchen holdings)

Chlorophyll captures red and blue light and gives off deeper red light, called fluorescence. There are several ways to see this, and one that’s now readily available at minimal cost is using a violet laser pointer. You can get a set of red, green, and violet laser pointers for about $12 online, say, at WalMart. Please see the note of caution about laser pointers at the end.

Here’s how it works. A few, select molecules such as chlorophyll and the pigments in “neon” markers and paints absorb one color of light and then emit some of that energy as light of a different color. Put simply:

* the light they absorb rearranges the electrons in the molecule into a higher energy state;

* the electrons can substantially reverse the process and emit light, which we call fluorescence. In almost all other kinds of molecules, this process is much, much slower than other processes that simply convert the electronic energy into heat; then, we don’t see energy coming out as light.

Chlorophyll is a wildly exceptional molecule in many ways that suit it to plants (and some bacteria) using it to capture the energy in light to transfer it finally to a chemical “factory” that runs a series of steps to store the energy in making stable compounds such as sugars. Its ability to fluoresce is a sideshow to its remarkable qualities that I touch on at the end here.

We can see chlorophyll fluoresce in its native state inside a leaf or else extracted from a leaf into a solvent; we can do both, readily. You need to get Chl (a handy abbreviation) to absorb light and then seen the emission of light. That emission is very, very fast, occurring in a few picoseconds, trillionths of a second. OK, Chl can absorb red light as from a red laser pointer and then emit slightly different red light… but we’re not able to shut off the red laser pointer and then see the red fluorescence, at least, not by eye!

The trick is to have Chl absorb light of a very different color, violet and then readily distinguish the red light coming with our eyes that are sensitive to many colors. Find a nice green leaf on a plant and shine the violet laser pointer onto it. Immediately you’ll see a pink glow where the laser light hits. You’re seeing the red fluorescence mixed with reflected violet light. To make the effect even clearer, place a piece of green paper or plastic next to the leaf; switch the position of the laser light between the leaf and the nonliving item. The contrast will be very clear. (You can use other colors of the nonliving item.)

PICTURES TO COME

Laser pointer with violet output

Video for frames to grab – shining on leaf, then on green paper, then back again

Why does this work? Chl absorbs both red and blue, with blue including even violet (recall the colors that abut each other in the rainbow). Chl has then two different electronic states of higher energy or excited states. One absorbs blue and violet, the other absorbs red. The blue-absorbing state is called S­ or the Singlet excited state number 2, and the red one is called S1. The singlet designation is very interesting, concerning the spin of electrons, but we’ll skip that detail for now. It takes light of higher energy in the violet or blue to excite Chl to the S2 state. The S2 state turns into the S1 state with extreme rapidity, dumping the excess energy as heat.

Let’s talk a bit about energy in light. The color of light is tied to its energy content. Light actually consists of individual bits called photons that act as both waves and particles (an amazing property in quantum mechanics). Light is characterized by its wavelength, which can be measured in various ways. Violet light from the laser pointer has a wavelength of 405 nanometers or nm; it’s barely visible to humans. That’s less than one-hundredth of the diameter of a typical human hair. Red light has a longer wavelength of 640 nm, and much lower energy.

So, violet light hitting the leaf pushes chlorophyll molecules into the high-energy S2 state; that decays extremely rapidly to the S1 state, which then rapidly emits red fluorescent light. Not all of the Chl molecules turn the energy into light; the efficiency of fluorescence isn’t 100%.

We can, however, make it higher than in a leaf, by taking Chl out of the leaf into solution. Grind up a leaf with a good solvent that’s not watery (water, for one, knocks the central magnesium atom out of the molecule, turning into a drab and inactive pheophytin molecule). I have used various handy solvents, including ordinary alcohol (ethanol) in a very pure state (190 proof if sold for consumption), wood alcohol (methanol, harder to buy), or acetone (nail polish remover). Put the leaf and the solvent in some vessel in which you can grind vigorously. The solvent will turn a rewarding green color. Shine the violet laser light on this solution and the red fluorescence will be vivid!

The fluorescence in solution is far stronger than in the leaf because it’s the main route for the Chl molecules to dispose of their energy. In contrast, in the leaf the energy can be almost fully delivered to the biochemistry of photosynthesis (an intricate and amazing story in itself). That brings up a great idea now implemented on several satellites, including the NASA Orbiting Carbon Observatory-2 (OCO-2) that views the whole Earth. The amount of fluorescence should drop when the plant is actively doing photosynthesis and rise when photosynthesis is cut back because the plant is stressed, such as by lack of water or extremes of temperature. Images from this satellite are now used to measure rates of photosynthesis and amounts of plant stress across the planet!

None of us has our own satellite to get data in a demo, though we can get the images and even the data. Let’s go back to what we have on hand. We’ve considered using the red and the violet laser pointers. There’s still a green laser pointer in the very inexpensive set. Can it tell us anything? Only indirectly. Chlorophyll doesn’t absorb green light; out of the red, green, and blue in sunlight it leaves the green, almost entirely. Leaves do have extra or auxiliary pigments to absorb a fair amount of the green light and pass some of that energy toward Chl molecules. Leaves can than absorb about 85% of the visible light from the Sun. To see this action, you might try using the green laser pointer while viewing the leaf through a filter that blocks green light. You can buy such filters at several places, including Edmund Scientific. You might see red fluorescence excited by a green laser pointer. Expect that this won’t work on a solution of chlorophyll, since you’ve lost some or most of the auxiliary pigments or put them in te wrong physical relation to the chlorophylls.

A note of caution: Of course, laser pointers are hazardous to your sight, as they are such concentrated sources of light. Don’t point them in your eye or anyone else’s eye. This is particularly dangerous with the green laser pointer. Green light is generated from far more intense infrared light by a process called frequency doubling. There’s a large amount of infrared light that can’t be converted, and that can really burn the eye.

I have another post/page that goes into more detail about why chlorophyll is such a magnificent molecule. Please check it out. This write-up is somewhat deep into the science, note.

Elephant toothpaste, two ways

MORE PICTURES TO COME

Elephant toothpaste: lotsa foam! Well, I’ve seen many elephants in the wild in Kenya, but I have to admit none was brushing his or her teeth. Still, here’s a dramatic generation of bubbles and foam from simple household items. The explanation leads to additional interesting concepts.

Equipment and supplies: hydrogen peroxide – regular home strength (3%) or super-duty hair-salon strength (20%); packaged yeast or compressed wet yeast (“cake yeast”); dish detergent; a tall cylinder such as a laboratory graduated cylinder, about 30 cm (1’) high and 4 cm wide (around 2”); a wide basin to catch the foam; for the follow-on experiments, a heat source (e.g., a microwave oven) and a cup to hold the yeast mix, an old alkaline cell, C or D size, side-cutters, and a small spoon.

Precautions: This is a pretty safe demo. If you proceed to the experiments with heat and with contents of an old battery (cell, really), take care to avoid getting scalded or cut.

Start with a demo, end with experiments. For the demo, put about 100 ml (around ½ cup, in old English units) of hydrogen peroxide into the cylinder. Add dish detergent and swirl the cylinder to mix it in. In a cup, put about 30 ml (2 Tbsp.) of warm – not hot – water, then add the yeast. Mix the yeast around and let it activate for a few minutes. You’ll get a thick-ish suspension of the yeast. Add it quickly to the peroxide/detergent! A rapid fountain of bubbles shoots up and over the top of the cylinder. Be sure to catch the overflow in a basin.

VIDEO TO COME

What happened? Yeast cells, as almost all living cells, have the extremely active enzyme, catalase, to protect them from oxygen in some of its dangerous forms. Start with the idea of a catalyst: it’s an item – a solid, a protein in solution, whatever – that increases the rate of a chemical reaction while ending up unchanged in the end. It participates in the “middle” of a chemical reaction but leaves it after speeding up the reaction. The cells in your body have several thousand different kinds of enzymes that catalyze almost every last chemical reaction that keeps you going. They not only speed the biochemical reactions but also control their rates, precisely. Catalysts occur all over the place. Gasoline is made from oil with the help of catalysts, precious metals on supporting structures. Ammonia as an agricultural fertilizer is made in quantities of more than 180 million tonnes (metric tons, 1000 kilograms each) every year, again using catalyst.

OK, why catalase, specifically? What’s the danger of oxygen? Many living cells such as our own use oxygen as the oxidizer to combine with fuels (sugars, fats, etc.) to release energy in controlled fashion. The process has a number of steps. At several steps, it’s possible to generate forms of oxygen that are potentially damaging to the other contents of the cell. One of these is peroxide, such as the hydrogen peroxide we added externally in this demo. A single molecule of catalase can break down almost 3 million molecules of hydrogen peroxide per second to water and normal gaseous oxygen. The reaction is written as

Variation: a second demo, or an experiment: Is catalase “alive”? OK, no chemical by itself is alive, only the whole set of chemicals in an intact cell or organism. However, what if the yeast cells are dead? Is catalase still active?

* You can experiment with ways to kill the yeast cells before adding them to the peroxide+detergent mix, or

* You can follow the instructions here as just a demonstration, though you will learn some more principles of science

As the demo: Let’s kill the yeast cells. They have no feeling, and you kill them in baking a yeast-raised bread or pastry, while the species lives on. One way to kill the cells is to heat them. After you make the yeast and water slurry, put the cup with them into the microwave and briefly boil them. Be careful not to have the slurry boil over. Let the slurry cool down so that the temperature is about the same as the first demo, to show that any changes in performance are not from temperature differences (learn to change one experimental variable at a time, if it’s possible). Add the slurry to a new peroxide+detergent mix. Does it foam really well? OK, if I don’t tell you what happens, it’s partly an experiment, beyond just a demo.

Variation: a third demo, or an experiment: Are there other things that can act as a catalyst to break down hydrogen peroxide quickly?

* You can experiment with them, trying them out, adding them to the peroxide+detergent mix.

* You can follow the instructions here as just a demonstration, though you will learn some more principles of science

As the demo: Let’s use manganese dioxide from an old alkaline cell (commonly called a battery, which is not really correct; batteries are made up of two or more cells). Cut into the cell with care not to cut yourself. I find it practical to use side-cutters (PICTURE), first, end-on to puncture the zinc wall, then in chewing motions to really open up the interior. The black sludge is manganese dioxide or some product of its reaction to make electricity. Scoop some out and mix it in water to make a slurry, as you did with yeast. Add the slurry to a new peroxide+detergent mix. Does it foam really well? Well, it foams, but far, far more slowly than with yeast. Nothing beats catalase as a catalyst for decomposing peroxide.