
This page will be brimming with content soon, as I’m revamping the site from scratch.
![]() Do these work? What do you need? Are the directions complete?
Do these work? What do you need? Are the directions complete?
The demos and experiments all work as noted. I present here are largely from what I’ve done at our small private school, the Las Cruces Academy, over the recent 12 years. So, they’ve been tested and found true. I did remove a couple that could pose some hazards, particularly if someone not a scientist with deep experimental experience might attempt them. Some of the experiments were done at our home with several remarkable families.
Equipment and supplies and what you might want/need: I acknowledge that, my wife Dr. Lou Ellen Kay and I having been career scientists has given us a lot of “stuff.” We were also the beneficiaries of the largess of physicist and educator Dr. Will Beattie. We’ve also invested in some of these goodies. I list items or categories, highlighting some of the expensive ones that help us but that you may go without in educating students. It’s a long list, but be not daunted; start a lab at any point.
Sketches, on up to elaborate directions: I’d like to get all the key ideas out in timely fashion, so I provide full directions for selected demos and experiments. For others, you may know how to do them anyway, or you can consult friends and colleagues or other websites and books, or you can ask me directly.
![]() Simple demos – teasers for experiments, as it were. I’ve lumped them into physics, chemistry, biology, and more, though all sciences tend to blend, such as when chemical analysis uses techniques of physics such as spectroscopy. Take a look.
Simple demos – teasers for experiments, as it were. I’ve lumped them into physics, chemistry, biology, and more, though all sciences tend to blend, such as when chemical analysis uses techniques of physics such as spectroscopy. Take a look.
Physics
 Magdeburg sphere: Air pressure opposing the vacuum in a small sphere withstands a lot of pull! Buy one online and have fun. A short demo and a longer post are here.
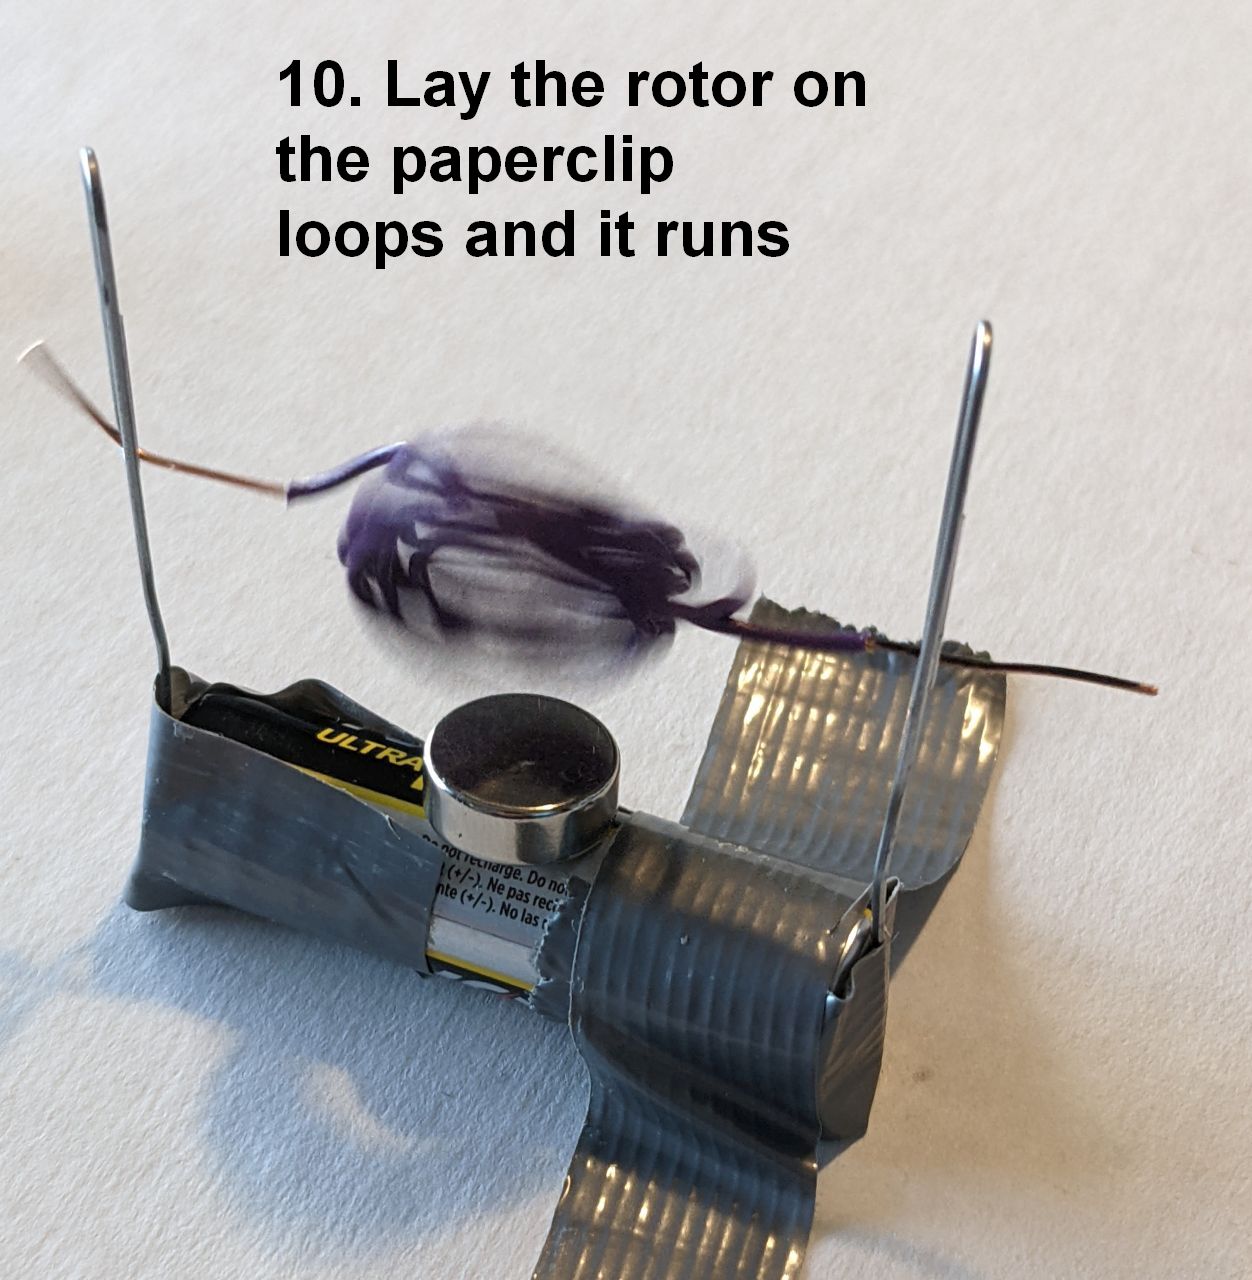
 Make an electric motor with a simple magnet and a loop of wire getting current through it from a common household “battery” (really called a cell, a dry cell): The essence of an electric motor is having magnetic fields repeatedly attract and repel each other. In this simple motor there is a fixed, strong, rare-earth magnet at the base, and a magnet field produced in a rotating part or rotor by the flow of a direct current. That current makes the rotor into a modest electromagnet.
The rotor is a coil of wire with two free ends that have been stripped to bare metal (use a knife or side-cutters carefully) so that the ends make electrical contact in a manner seen below. Key thing: Lay the coil flat and insulate one side of the bare wire by rubbing a good marker on it. This makes sure that the current gets interrupted on part of the cycle and keeps the rotor going in one direction.
Use a simple AA dry cell as the current source. Take two bare-metal paper clips (that it, not plastic-coated) and straighten out a length on each to make a vertical support for the rotor, as below. Affix the paper clips to the battery, one on each end, so that they stand vertically. Stiff duct tape should work. Brace the AA cell against rolling, such as with lumps of clay:
Now put a strong rare-earth magnet on top of the AA cell. Slide the rotor into position between the paper clip ends, and bend one or both ends to keep the rotor from slipping out. The rotor should start spinning vigorously, perhaps needing an initial spin by hand!
Hints: Make the rotor with wire that’s stiff but not too heavy. Use only solid wire, not stranded wire, which goes limp.
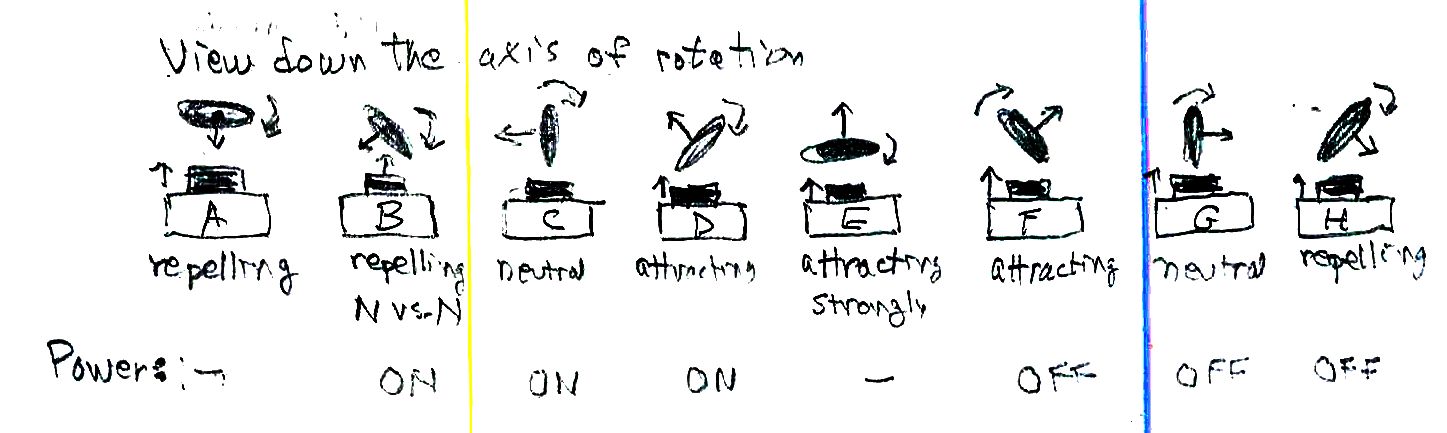
How it works: As the rotor rotates over the magnet, it is at times attracted to the magnet and at times repelled. The diagram below shows eight phases of a complete rotation as we look down the axis of the rotor. At point A there’s a repulsion of the rotor as an electromagnet but no torque or twisting action. The rotor will keep moving, however, if it has been rotating; it has momentum (angular momentum). At point B the rotor and the fixed magnet repel each other, forcing the rotor to rotate faster. At point C the effect is neutral but the rotor has angular momentum to keep rotating. At point D the fixed magnet “sees” the opposite pole of the rotor and attracts it, helping to pull the rotor around further. At later points F, G, H we want the current off so that the rotor is not pulled the opposite way to bring it ultimately to a standstill. To do this we have put the insulating marker coating on one side (say, up to one half) of the circumference of the bare wire end.
Here’s how the motor is assembled. The images below are numbered; the numbers and the text only show when you click an image to see it full size (a quirk of WordPress)


You can go further with this demo, making it more of an experiment. You can find the magnetic polarity (north and south directionality) of both the fixed magnet and the rotor. Use a simple compass to see which end of the compass needle moves toward the rotor (energized but held from rotating) or the fixed magnet. The rotor’s polarity depends on the direction of the current (you can swap it end for end to change the direction of rotation). Its polarity also depends on which way you wrapped the rotor, clockwise of counterclockwise as viewed from the end; you can even predict the polarity from the “right-hand rule” relating current and the magnetic field (look this up). The direction should depend on the polarity of the fixed magnet, too; flip it over and watch again.
The slow magnet: Dropping a rare-earth magnet in a copper tube: buy or borrow a pure copper tube with 3/4″ inside diameter and about 18″ long (hardware stores, alas, don’t yet do metric!). Also get a strong rare-earth magnet about 1/2″ in diameter.
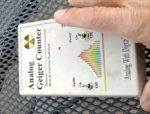 Radiation straight from the heart. In 2017 I had a diagnostic procedure done, in which I exercised and then got injected with the radioactive element (radionuclide) technetium-99 metastable. The gamma rays came flying out of my body to create an image on a screen. I was still radioactively “hot” hours later, as a Geiger counter showed.
The Tc-99 was chemically bound to a ligand that migrates preferentially to the heart. The idea was to map the blood vessels around my heart – all normal, as it turned out. I was exposed to many gamma rays but for a fairly short time; the Tc-99 has a half-life of 6 hours. My total exposure was [let me find my notes again], a fraction of my normal dose from cosmic rays, internal potassium load, and other sources. It was enough to increase my lifetime chance of cancer by 1%. Anyway, about 6 hours after the test I wanted to show how radioactive I was. I put a Geiger counter I had built from a kit on a table and walked up to it, while taking a video. I pegged the Geiger counter output when my chest reached it. Fortunately, not only does Tc-99 decay fast, but the gamma rays don’t deposit much radiation in my body on the way out; if they did do so, they’d make a too-fuzzy image. Note that Tc-99 is made “on-site” in the doctor’s office. He or she gets a device loaded with molybdenum-99 that’s decaying to the metastable state of Tc-99. When a diagnostic dose is needed the Tc-99 is quickly separated out chemically and bound to a special chemical, the ligand.
FILLING IN over the next couple of months (expected by August, 2022):
Zapping a thin copper wire to vapor and melt, with a biiiiiig electrical capacitor
How radiation from uranium ore travels and attenuates
Liquid nitrogen for fun and (intellectual) profit – marshmallows
Cartesian diver
Thermal images of sky and land, and of people
Sound not propagated through a vacuum
Completing an electrical circuit with a pencil trace
Balloon expanding in a vacuum chamber
Marshmallow expanding in a vacuum chamber
LN2 = liquid nitrogen-frozen marshmallow and more
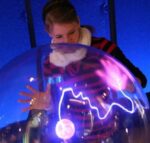
Plasma sphere
Completing an electrical circuit with a pencil trace
Newton’s cradle
Model rocket flight with a kindergarten student
Floating a needle on water – surface tension
Dangerous: Electric pickle
Kicking a soccer ball – seeing indentation in high-speed video
Polarized light on stressed plastic piece
Circular polarization with two polarizers, reversed
Eliminating birefringence in calcite with a Polarizer
What is a spectroscope? – many things to look at
Flame spectra of metals
Chemistry
Spontaneous ignition : the powerful oxidant (potassium permanganate and sulfuric acid) reacts with ordinary ethanol to create a flame. A more dangerous demo, done in a safe area at a safe distance, is nitric acid as the oxidant in a shallow dish.
 Elephant toothpaste: lotsa foam. The enzyme catalase in yeast cells rapidly liberates oxygen gas from hydrogen peroxide. It does so in yeasts naturally to protect cells from oxidative damage. We also made it into an actual experiment by selecting conditions. As a demo, the instructions are very simple: mix hydrogen peroxide (normal 3% or very dramatic 20% from a hair salon) and dish detergent. Make a sluice of yeast from cake or powder form added to water. Add it quickly to the peroxide/detergent and be sure to catch the overflow in a basin! Variation: instead of yeast use manganese dioxide dug out of an alkaline cell. It’s not as dramatic; the contrast is an experiment.
 Mostly chemistry: making flash paper, and even flash paper airplanes. This needs great care, against acid burns, flame, and NO2/nitronium ion inhalation. I cite the chemistry of the preparation (nitration of pure cellulose, as of paper towels) and of the ignition. Concentrated nitric and sulfuric acid create a powerful agent that replaces hydroxyl (or alcohol) groups in cellulose with nitro groups. The preparation is so hazardous that only a trained chemist such as I am should do the reaction. In any case, the nitro groups act as oxidants internal to the cellulose backbone. The properly treated paper burns in a flash, even before someone holding it can let it drop to the ground. We made flash paper airplanes and filmed them at up to 1000 frames per second with a great little camera, the Casio Exilim ZR-100 (no longer made, alas).
COMING SOON-ISH
Flame spectra of metals
Reversible blue bottle
Potato battery
Dimming of candle as air is taken out in a vacuum chamber
Pouring CO2 onto candle to extinguish it
Luminol reaction – chemistry makes light directly
Carbonization of sugar by sulfuric acid – be really careful!
Aluminum dust burns with iodine
Fun chemicals
The metals – appearance of bismuth
Cool, liquid gallium metal eats an aluminum can
Gallium wiped thinly on glass to make a mirror
Gallium alloy – a safe filling for a thermometer
Relighting a candle from the vapor stream
Copper deposition on a metal without an electrical current
Electrolysis of water, for a bang.
Sodium in (hot) water.
Reversible blue bottle
Pouring CO2 onto candle
Biology
COMING SOON-ISH
Bacteria on us, made visible
Chlorophyll fluorescence in living leaf
Ascent of water (with dye) in a plant stem
Mixing red, green, and blue with LEDs to make many colors
Chl fluorescence in light of different colors
Seeing tiny RGB pixels on a computer monitor – see almost any color!
And more
Some meteorology
Condensing water vapor in a bottle un-squeezed – insight into how clouds form
![]() Student experiments – focus is high-level grades 6-8
Student experiments – focus is high-level grades 6-8
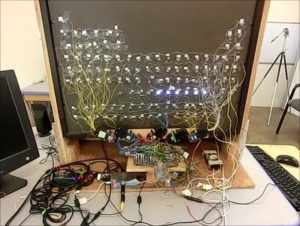
![]() Multi-year project: LUPT – by students in grades 4-6, with me. We made a periodic table of the chemical elements backlit by 112 programmable LEDs that are tied to 472 student-recorded narrations about the elements’ discoveries, properties, nucleosyntheses, and abundances
Multi-year project: LUPT – by students in grades 4-6, with me. We made a periodic table of the chemical elements backlit by 112 programmable LEDs that are tied to 472 student-recorded narrations about the elements’ discoveries, properties, nucleosyntheses, and abundances
- The full story of the LUPT, as a PDF file.
- A shorter version, also PDF.
- A link to the 8-minute video on YouTube.
- A sample of the narrations. Remember, these were written and recorded by students in 4th to 6th grade at the time:
- From the session on nucleosythesis: supernova
- From the session on elements by atomic number: cerium
- From the session on discovery of the elements: fluorine
- From the session on abundance of elements in the human body: calcium; catch the one oversight
- From the session of abundance of elements in the Earth’s crust: lithium
- The final Python program we all wrote:
- As used with our own special logic board, our small TFT display for the user’s options, and the GPIO pins on the Raspberry Pi computer
- A version that uses keyboard input on Windows and that plays narrations, but doesn’t light up LEDs or show on a TFT display. You can see the program logic
- A similar version, for Linux
- Instructions for installing and using Python
- And, to be sure, a table of contents of the DVD, should you want one.
- Our logic board
![]() Make it yourself – circuits, sensors, devices for rocket altitude…
Make it yourself – circuits, sensors, devices for rocket altitude…
![]() To buy for a science lab – some of my suggestions
To buy for a science lab – some of my suggestions
![]() STEM websites
STEM websites
![]() Math – OK, math isn’t science but it really underpins science, and is fun
Math – OK, math isn’t science but it really underpins science, and is fun
