Newton’s cradle: momentum running around

PICTURES COMING SOON

What does Isaac Newton teach us with an intriguing “toy,” Newton’s cradle. The quantity of motion, or momentum, is conserved. When steel balls collide, there are many possible patterns of which ones go and how fast. It’s addictive to try many patterns.

Newton’s cradle: momentum running around

Equipment: a Newton’s cradle ($18)

Newton’s cradle is a set of 5 steel balls hanging by light monofilament line. At rest, all 5 balls lie in a straight line, touching each other. One can then take any number of balls away to the side and release them, in order to watch the responses of all the balls, both those released and those initially at rest, They collide, move apart, collide again and again, while energy losses slow them (we’ll talk about where those losses are, later).

Newton’s cradle

Static

Videos for frame grabs – 1L; 2L; 3L; 1L+1R; 1L + 2R; 1+2L to stick to 3

The object lesson is learning the conservation of momentum, as well as the conservation of energy. Moving objects carry momentum; that’s the quantity of motion and it equals the mass of the object multiplied by its velocity. Yes, velocity has direction, not only magnitude or size, and so does momentum, but we know we’re only talking about motion in one direction, so let’s just call it speed. With mass m and speed v, the momentum is calculated simply as mv, that is, m multiplied by v.

The object also carries energy of motion, called kinetic energy. You need a bit more physics, but let’s just use the result that kinetic energy, KE, equals ½ the mass multiplied by the square of the speed, or ½ mv2.

When “elastic” objects such as steel ball bearings collide in the Newton’s cradle, momentum and energy both go into other balls. This tells us what the pattern of motion is after the collision.

Consider lifting the leftmost two balls up and to the left, then releasing them. They hit the three stationary balls. Then, the ball in the middle stays put and the two rightmost balls fly off to the right, a mirror image of the starting case. Those two balls are then moving at the same speed as the leftmost balls had when they contacted the other balls. It’s easy to prove mathematically that the only state of motion that conserves momentum and that also conserves kinetic energy is this fling to the right by two balls. You won’t get all three originally stationary balls moving off at various speeds; only two balls move. (The exact solution in physics gives a slightly different result, but minimally different when we take account of the tiny starting separations of the balls and the elastic deformations of the balls; yes, the steel balls deform a tiny bit as they collide! And, yes, steel is elastic, meaning that it deforms under a force and then regains its form almost exactly as the force is released. It’s a bit more complex that that, but steel and other elastic items don’t lose much energy in being hit and deformed.)

PICTURES – see list at top

Everyone likes to try different combinations – release only one ball from the left (only one ball leaves on the right); release three balls from the left (three balls leave on the right); release balls from opposite sides, one from the left and one from the right, both at the same speed (they both simply bounce back); release one ball from the left at twice the speed of a ball released from the right (check this out yourself). You can also make balls act as single units. Put a bit of modeling clay between two balls at the left and release them as a single unit. (Two balls shoot off to the right, the same as if the balls were not stuck together.) Try releasing those two balls at the same time as releasing a ball from the right at the same speed…. and then at twice the speed. Try putting clay on the side of the two balls that will hit the three stationary balls. What happens? You can see the results. If you want to get into the math, you can analyze all these cases. You could go to the exact solution, but that’s pretty heavy-duty math.

The exchange of momentum is very clear. The exchange of energy is a deeper story. In fact, we have to consider a second kind of energy called potential energy. In moving balls to the left or to the right while holding them “tight” on their supporting strings, we have to lift them up a bit against the force of gravity. That is storing potential energy. As the balls move, the potential energy is continuously converted into kinetic energy; gravity pulls on the balls to increase their movement, or accelerate them. The pattern in time of how potential energy changes into kinetic energy is an advanced topic that you’ll find in physics courses; the math is fun.

The motion of the balls slows down over time. Clearly, energy has been lost, both as kinetic energy and as potential energy. Where did it go? It got converted into two other forms. One is kinetic energy of air molecules pushed around as the balls move – they’re creating a little wind that carries energy farther and farther away. A second one is heat in the balls. Steel is not perfectly elastic. At each collision, some of the obvious or macroscopic motion gets changed into rapid internal motions among all of its atoms -sound waves run around in the ball and then slowly degrade into random motions called heat. You would find it vey hard to measure the rise in temperature of the balls after collisions. It’s very tiny, but real.

The challenge with the Newton’s cradle is that everyone wants to try their own releases. Leave more time for this than for most demos! It can be a good learning experience for students to sketch the resuls of all the different trials.


Make your own electric motor

Make your own small electric motor with a loop of wire, a magnet, a AA dry cell, and a few odds and ends. It works the same way as large motors, though don’t count on powering a Tesla this way.

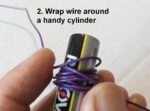
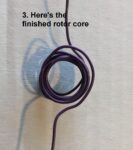
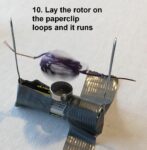
Make an electric motor with a simple magnet and a loop of wire getting current through it from a common household “battery” (really called a cell, a dry cell): The essence of an electric motor is having magnetic fields repeatedly attract and repel each other.  In this simple motor there is a fixed, strong, rare-earth magnet at the base, and a magnet field produced in a rotating part or rotor by the flow of a direct current. That current makes the rotor into a modest electromagnet.

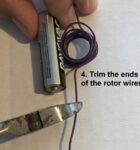
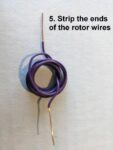
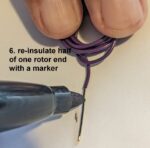
The rotor is a coil of wire with two free ends that have been stripped to bare metal (use a knife or side-cutters carefully) so that the ends make electrical contact in a manner seen below.  Key thing: Lay the coil flat and insulate one side of the bare wire by rubbing a good marker on it. This makes sure that the current gets interrupted on part of the cycle and keeps the rotor going in one direction.

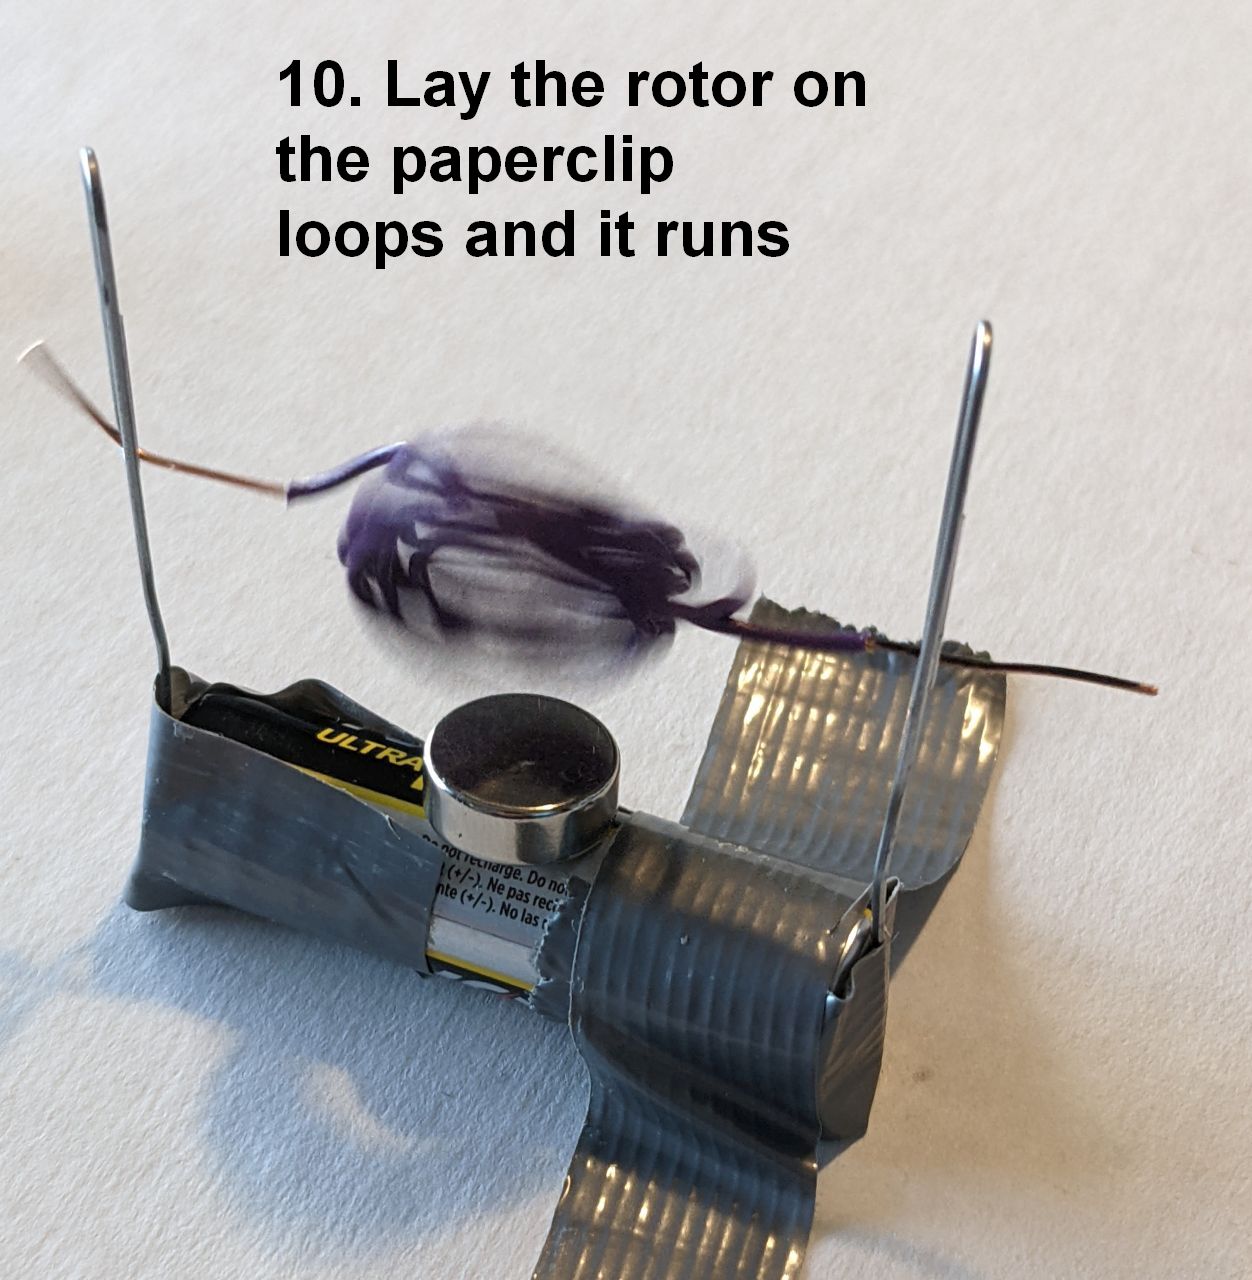
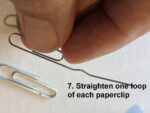
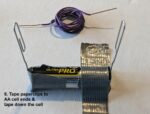
Use a simple AA dry cell as the current source.  Take two bare-metal paper clips (that it, not plastic-coated) and straighten out a length on each to make a vertical support for the rotor, as below.  Affix the paper clips to the battery, one on each end, so that they stand vertically. Stiff duct tape should work. Brace the AA cell against rolling, such as with lumps of clay:

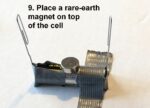
Now put a strong rare-earth magnet on top of the AA cell.  Slide the rotor into position between the paper clip ends, and bend one or both ends to keep the rotor from slipping out. The rotor should start spinning vigorously, perhaps needing an initial spin by hand!

Hints: Make the rotor with wire that’s stiff but not too heavy.  Use only solid wire, not stranded wire, which goes limp.

How it works: As the rotor rotates over the magnet, it is at times attracted to the magnet and at times repelled.  The diagram below shows eight phases of a complete rotation as we look down the axis of the rotor. At point A there’s a repulsion of the rotor as an electromagnet but no torque or twisting action. The rotor will keep moving, however, if it has been rotating; it has momentum (angular momentum).  At point B the rotor and the fixed magnet repel each other, forcing the rotor to rotate faster.  At point C the effect is neutral but the rotor has angular momentum to keep rotating.  At point D the fixed magnet “sees” the opposite pole of the rotor and attracts it, helping to pull the rotor around further.  At later points F, G, H we want the current off so that the rotor is not pulled the opposite way to bring it ultimately to a standstill.   To do this we have put the insulating marker coating on one side (say, up to one half) of the circumference of the bare wire end.

Here’s how the motor is assembled. The images below are numbered; the numbers and the text only show when you click an image to see it full size (a quirk of WordPress)

You can go further with this demo, making it more of an experiment.  You can find the magnetic polarity (north and south directionality) of both the fixed magnet and the rotor.  Use a simple compass to see which end of the compass needle moves toward the rotor (energized but held from rotating) or the fixed magnet. The rotor’s polarity depends on the direction of the current (you can swap it end for end to change the direction of rotation).  Its polarity also depends on which way you wrapped the rotor, clockwise of counterclockwise as viewed from the end; you can even predict the polarity from the “right-hand rule” relating current and the magnetic field (look this up). The direction should depend on the polarity of the fixed magnet, too; flip it over and watch again.

The Magdeburg sphere

PICTURES COMING SOON

Explore how really big air pressure is with a device first made 368 years ago – the Magdeburg sphere. An inexpensive “toy” can defeat some very strong people trying to pull it apart after someone sucks out some air.

Explore how really big air pressure is: evacuate a Magdeburg sphere:

Equipment: “toy” Magdeburg sphere. You can buy one in cast iron for about $25.

Note: You can do this without a vacuum pump; with a pump you can make the effect stronger.

This goes back to a dramatic demonstration 368 years ago in the town of Magdeburg, Germany. The town mayor, Otto von Guericke, had invented an effective air pump. He used it to pump the air out of a sphere made of two halves joined with an air-tight gasket. He then showed that the pressure of normal air outside was so great that two teams of 15 horses each pulling on the two halves could not separate the sphere! The sphere was ½ meter in diameter, so the area of each half-sphere was about 0.2 square meters. If all the air had been pumped out, the force on each half would be 20,000 newtons, that of a 2,000 kilogram mass in Earth’s gravity. Multiply by two for the two halves. You get the same force as exerted by a 4,000 kilogram mass, about 8,800 pounds!

You can do this on a small scale with the “toy” Magdeburg sphere. Here’s a picture:

PICTURES from above

Clean the rims of both halves well and then apply some thick grease, ideally vacuum grease such as you get with the vacuum pump. Join the halves and now suck out the air. First trial: do this by mouth (take care re hygiene; only one person does this, or you wipe down the tube with alcohol each time). Open the valve, put the exit tube in your mouth, and suck the air out. Using “cheek power” you can readily pull a vacuum that’s about 1/3 of normal air pressure. Close the valve. On a sphere of 8 cm internal diameter, you have an area of both halves that’s about 100 square cm or 0.01 square meter. The force on the halves at 1/3 of air pressure difference between outside and inside is then about 0.33*100,000*0.01 newtons or 330 newtons. That’s the force exerted by a 33 kg weight, or about 70 pounds. Get two people to try to pull the sphere apart; there are handles. Some strong, older students might be able to exert enough force to do this. They’ll fall in opposite directions suddenly; do this on a safe, soft surface such as a lawn, or pea gravel as we have at our school. Now boost the demo: connect the exit tube to the vacuum tubing on the vacuum pump and pump the air out. Now the effective force is 3x greater, that of a 100 kg weight. No two people can pull the sphere apart while standing, or maybe even foot-to-foot lying down!

YouTube link


Squeeze and sink

PICTURES COMING SOON

Control a tiny “submarine” with a hard squeeze… and learn the principle of how anything floats, from an ice cube to a ship. All you need is a handy plastic bottle, a test tube, some water, and a ruler.

Cartesian diver – squeeze a bottle and make it sink:

Equipment: minimal, cheap.

The Cartesian diver is a small item such as a test tube with an air space that just barely floats because it has an air bubble giving it buoyancy; it sinks when the air pressure on it increases to compress the bubble. To create the higher pressure, the diver is contained in a sealed vessel such as a plastic drink bottle. Squeezing the bottle (with its cap on!) creates the extra pressure. The Cartesian diver illustrates the principle of hydrostatics, that the upward force on an immersed object is equal to the weight of water (I presume you’ll use water) that the object displaces. With the right-sized air bubble, the object and its contained air bubble displaces a greater weight of water than its own weight. Squeezing the bottle compresses the air bubble and allow water to enter. Now the diver is not displacing as much weight of water as its own weight; it sinks. Relieving the pressure lets the diver rise. The cycle can be repeated endlessly. The hydrostatic principle applies to SCUBA divers, submarines, fish with swim bladders, and more. A note: I do mean weight, which is mass multiplied by the acceleration of gravity. People often confuse weight and mass, and, here, it’s actual weight.

Here are two images of the diver, afloat and sunk:

PICTURES

My combined sketch

Photo, filled bottle

Photo, dropping in the test tube

Photo, test tube floating

Photo? Measuring the float height

Photo, filling in the test tube

Video, quickly slipping in the partly filled test tube, then seeing it barely float, then squeezing it to make it sink, then letting up P to have it float again

Needed:

* A squeezable plastic bottle with its cap available.

* A “diver” – here, I use a simple glass test tube. You can use any clear item that will float with the air bubble up (not overturning). Be sure the test tube is glass and not plastic. Plastic won’t ever sink. Use a thin-walled glass test tube; a heavy one might not float, even empty.

* Water to fill the plastic bottle and to fill part of the volume of the diver.

* A short ruler

* A place to do this, away from computers and anything else that can be damaged by water

Fill the bottle with water nearly to the top. Do this over a basin because you’re going to spill some water.

  • Fill the bottle all the way to the top. Holding the test tube upside down, slip it into the bottle. It will bob up so that about half of it will be above the water line. We’ll get to why it reaches that level, later.
  • Now measure the height from the top of the water to the top of the tube. You’re going to want to take the test tube out of the water and fill it with almost the same volume of water as there was empty (air) space bobbing up; that will cancel the extra displacement of water that keeps the tube floating. So, suppose you had a 10 cm (4”) test tube and it floated with 4 cm above the water.
  • Take the test tube out and, holding it upright with the opening at the top, fill it with a little less water, say, 3.6 cm or 90% of the empty space. You can measure out the water slowly or be a little cavalier and then shake the tube sideways as needed to reduce any overfilling.
  • Now insert the test tube, again upside down, into the bottle. You want to keep all the water in the test tube, so do this quickly. Hold the water bottle at an angle just short of spilling out its water. Hold the test tube also at an angle, facing the water bottle. Swiftly push the test tube into the bottle.
  • If you didn’t spill any significant amount of water, the test tube, your diver, should just barely float. Now cap the bottle, tightly. When you squeeze the bottle tightly enough, the diver will sink to the bottom. Release the pressure and the diver will rise. You can do this indefinitely.
  • If the diver floats too high, it won’t sink with the highest pressure squeeze you can make. Take the diver out (easy: squeeze the bottle to bring the diver just above the rim of the bottle). If the diver sinks, retrieve it and fill it with less water. The easiest or least messy way is to hold the bottle upside down over a basin. Let your thumb off the bottle opening and grab the divers as it begins to come out. Refill the water bottle again.

A little more detail: Why use a glass test tube: Glass is denser than water; about 2.5 times more. By itself, it will sink. You have to give it a bit of air with water in its interior to make its filled weight match the weight of water it displaces. Plastic, on the other hand, is less dense than water and you can never get it to sink.

Making it a more quantitative demo: Calculate the level of air you need in the diver. You need to get the “weight” (mass) of the test tube, either using a small electronic scale or using geometry and the density of glass. Contact me if you’d like to see the sample calculations using the test tube dimensions.


A magnet fighting its own fall

PICTURES ARE COMING SOON

A magnet that fights its own fall? In a copper tube that conducts electricity so well, a magnet can do this.

The slow magnet: Dropping a rare-earth magnet in a copper tube: buy or borrow a pure copper tube with 3/4″ inside diameter and about 18″ long (hardware stores, alas, don’t yet do metric!). Also get a strong rare-earth magnet about 1/2″ in diameter.

It’s important to have it as long as or longer than its diameter so that it won’t tumble going down.  Stack a bunch of button magnets, if need be.  Hold the Cu tube over a soft pad (so that the magnets don’t crack hitting the desk or floor). Drop a nonmagnetic piece of similar shape down the tube; it comes out fast (about  0.3 sec.). Drop the magnet down the tube, especially while a student watches from above.  Better yet, let the student do it. The magnet takes several seconds to fall.  As it moves down the tube, its magnetic field “cuts” the copper tube to create an electrical current circulating around the circumference.  That creates it own magnetic field that opposes that of the magnet, slowing down its fall. You might ask if the fall could be stopped completely (with an answer that should be obvious) or several other questions.

PICTURE, VIDEO

gallium, the weird metal

PICTURES COMING SOON

Gallium: a weird liquid metal in your hand! It’s as shiny and mobile as mercury but so safe… unless you’re a Coke can. It’s a liquid wire to carry electricity. It acts like ice on freezing. With a simple AAA cell you can make it take extremely different shapes. It’s easy and inexpensive to buy, for much fun.

Equipment and supplies: For many parts of this demo It depends on how many of the 6 parts of the whole demo you wish to do. Foremost, you need gallium ($14 or more; see below). Get some simple containers, cups or chemical beakers, to hold warm or cold water. Get a piece of glass (careful of the edges) or a glass bottle for demo 2. For demo 3 get an empty aluminum can and a piece of sandpaper. For demo 4 get a small, clear, rigid tube – glass or plastic. For demo 5 make a small trough, even in modeling clay, and get the use of an electronic multimeter ($10 or more) to measure electrical resistance. For demo 6 get a beaker, some sodium hydroxide ($10, or less if you pick the lye crystals out of some Drano carefully, not with bare hands), some wire, a piece of aluminum (maybe even a bit of aluminum foil), and a AAA cell.

Many of us, chemists and members of the general public, remember mercury, the liquid metal. You could pour it out, even onto your hand, as a beautiful, silvery, shimmering liquid. While you can still do that, people will look askance at you for the potential health hazard. There is such a hazard but almost solely if you let certain bacteria at it in oxygen-free environments to make astoundingly toxic methyl mercury or dimethyl mercury. So, avoid the problem and get some gallium. I bought some several years ago along with also fascinating bismuth metal, for a total of $55. You can get it from Luciteria.com, where you can get almost any chemical element! You can get 20 grams for about $14.

Demo 1: Melt it, even in your hand: The gallium will sit in the container as a silvery solid like any nice metal. However, warm it up a little and it melts. If you’re patient and your hands are not cold, it will melt in your hand. Its melting point is 30°C, which is 86°F. If you’re less patient, warm up some warm and insert the container.

Demo 2: The shimmer and the streak: Carefully pour some out onto your hand. No worries. It’s essentially totally nontoxic. Roll it around and let it slosh around. Try not to spill any; it will leave a gray streak on lots of surfaces, even on your hand. The streak is readily washed off with a little soap and water. You can paint on glass with gallium, with a little practice. Get some gallium on your finger and rub it onto a clean glass surface. I did this on old wine bottles. Only a little suffices to create a fine, silvery mirror.

PICTURE(S)

Demo 3: Eating a coke can! Find an empty coke can or other aluminum can. Empty, I say, for reasons that become clear. Have your gallium liquid. Take a bit of sandpaper and scrape an area on the lid of the can. Deposit some liquid gallium on the area. Come back in an hour or two. The gallium will look odd and the can, more so. You can now push your finger easily through the lid! Gallium atoms have diffused into the aluminum metal, moving on their own just as a drop of food coloring diffuses slowly into still water. Gallium is a chemical analog of aluminum – it shares many of the same physical and chemical properties, but its crystal structure as a solid is spaced differently from that of aluminum. The presence of gallium pushes the crystals of aluminum apart, massively weakening the lid (yes, crystals, as are all solid metals in many small places). You’ll also notice that the decay of the aluminum lid extends well beyond the place where you applied the gallium; the diffusion kept going.

PICTURE

Demo 4: It’s slow to freeze and it does an odd thing: Gallium is one of the very few liquids that expands on freezing, just as water ice does. As also with ice, you can demonstrate this by putting a little bit of it as a liquid, a few grams, into a tube and letting it cool, say, in a bath of cool water. If you have a thermometer you can try baths of different temperatures. You’ll find that it takes a bath a number of degrees below the nominal melting point of 30°C for gallium to freeze. It will “supercool” and then suddenly start turning solid when you’ve pushed supercooling too far. The same supercooling phenomenon occurs in water. Some clouds have water droplets cooled far below 0°C. An airplane flying through such a cloud can collect these droplets that instantly become ice, and that’s usually a growing problem! Also, you can mark the tube at the height of the liquid and then see that it’s higher when the solid forms. The expansion of the liquid on freezing can create great force, as is readily shown by freezing water inside a metal container filled to the top (a soft drink so frozen has additional things going on, though it also explodes).

Demo 5: The liquid is a fine electrical conductor: Most metals conduct electricity much more poorly as liquids than as solids. The disorder of the locations of atoms in the liquid phase causes the electrons moving through it to scatter. They lose momentum and it takes more force, more voltage, to move a current. To see this, solidify some gallium in a “boat” shape – that is, some little trough with closed ends. Take a simple electronic multimeter that you’ve set to the setting of resistance (ohms, Ω). Touch the two probe tips to the two ends of the solid gallium and record the resistance in ohms. Now, melt the gallium in the trough by any handy means, even a hair dryer on low heat held at a distance so as not to splatter the liquid. When the gallium is liquid, repeat the measurement. It’s lower!

PICTURE

Demo 6: Gallium has a huge surface tension: When you put a drop of water on a surface that water doesn’t wet, such as clean glass or most plastics or some plant leaves, it forms into a ball, a bead. The attraction of the water molecules for themselves is far stronger than their attraction for the molecules of the surface. The best way to reach the lowest energy state is to stay as compact as possible, toward a spherical shape. That reduces the surface created. Surface tension is a measure of how much new force is needed to expose more surface. There’s a lot to explore in that concept. For now, let’s just note that gallium has seven times higher surface tension than water! Hmm. So why does it flow nicely over my hand? Well, when it’s exposed to air, gallium combines with oxygen gas in the air to make an extremely thin layer of gallium oxide, Ga2O3. Aluminum also makes an oxide layer, as you might expect from Ga and Al being in the same column of the periodic table of the chemical elements. Anyway, we can eliminate that layer.

Here we go: Get a chemical beaker. Pour in some water that is warm enough to keep the gallium liquid. Dissolve a bit of sodium hydroxide, known as lye, in the water. Do this carefully, since lye is corrosive and hazardous to human tissue (on your hand, it will first just make it slippery because it breaks down fats around your cells. Don’t leave it there. Don’t let it get to your eye! Wash it off; wash your eye with running water for several minutes if you get any lye in it. To continue, make a simple electrical circuit. Attach a wire to a piece of aluminum and suspend at least part of the aluminum in the liquid. Run another wire to the liquid gallium at the bottom of the beaker. Now, touch the two ends of the wires you have outside the liquid to the two ends of a 1.5 volt battery, such as a AAA cell. One of two things will happen. If you put the wire that runs to the gallium on the bottom of the AAA cell, you have made the gallium negative electrically. That chemically reduces the oxide coating to pure gallium. It then exhibits its maximum surface tension and really balls up. Now, switch the leads, making the gallium positive. It gets oxidized… .and it spreads out into fantastic shapes called fractals. It spreads even though the oxide coating is something of a restraint. The coating keeps getting dissolved by the lye, allowing the metal to spread!

Picture

End notes – some history: Where did the name gallium come from? The existence of gallium as a chemical element was predicted by the great Russian chemist Dmitri Mendeleev in 1867. He had data from the world chemistry community (hard to get in pre-Internet days!) about 48 chemical elements, including the relative mass of the atoms in each element. He put them in a 2-by-2 chart according to repeating properties. There was a gap below aluminum, so he boldly predicted there was a metallic element acting a lot like aluminum chemically with an atomic mass of about 68 with a density of 5.9 grams per cubic centimeter. In 1875 the fine French chemist Paul-Émile Lecoq de Boisbaudran used the relatively new method of spectroscopy to determine there was another, distinct chemical element in some metal samples. He purified it and there was gallium. It’s atomic mass of 69.7 was close to Mendeleev’s prediction, and so was its density of 5.91 grams per cubic centimeter. Being French, Boisbaudran honored his home country by giving the element a name derived from the Latin name of France, Gallia. Boisbaudran is also credited with discovering the elements samarium and dysprosium. His name is pronounced as bwah boh drahn, or more precisely in international phonetic symbols that I haven’t copied here. The “r” is lightly trilled and the “ah” is breathy.


colored flames

PICTURES COMING SOON

Flames in many colors: Just add the right chemical element and you can get red, orange, yellow, green, blue, or violet. Some of these elements occur in common household chemicals. A propane or butane torch, an old spray bottle, and some safety precautions and you’re good to go. There’s interesting quantum physics behind it all, too.

Many-colored flames

Equipment: a butane or propane torch ($15; be sure only a responsible adult handles it!); a selection of chemical compounds (some cheap, others pricey; I’ll note the safety issues, which can be handled readily).

This demo can be done as a short “Gee, whiz” demo, rapidly showing the flame colors. It’s far more interesting with all the context I develop here; I offer a lot of it here for fun and education.

We’ve all seen flames with different colors – the blue and yellow of a candle flame, some pure blue from a natural gas flame, deep red in a charcoal fire. Some of us have seen exceptional flames, such as burning magnesium (blindingly white, literally – never keep looking at it).

Getting new colors: We can look at what causes different flame colors. More than that, we can get many different colors in a flame by adding simple chemicals in small amounts. Take ordinary table salt, sodium chloride. Dissolve salt in some water. Put it in a small spray bottle (say, from eyeglass cleaner or nasal spray, cleaned out and dried). Set up the butane torch. Safety:

* Have an adult do this

* Be sure that the torch is very stable, on a table or desk; a torch knocked over can be a serious hazard.

* Have a fire extinguisher handy.

Get the butane torch burning nice and light blue. Spray the solution steadily into the flame about halfway along its length. You’ll get a vivid yellow! Why? To answer this we’ll talk about how electrons are running around in atoms (and molecules) and how changes in their states relate to energy, thus, to the color of light.

We’ll talk a bit more about safety of the chemicals at the end. First, please note that no one should inhale the spray! Toxicities are low but non-zero. There should be no problem with the small amounts sprayed into the flame and reaching the air in the room.

PICTURES

Why the colors appear: In chemistry or physics you learn that the atom has a tiny, very dense nucleus with a positive charge and a set of electrons of negative charge moving around them. The actual motion is complex and even beautiful while often simplified as the electrons moving in circular or elliptical orbits. The real patterns still retain the interpretation that electrons in an atom “at rest” occur at distinct or discrete energy levels. Let’s build up a sodium atom from a bare nucleus. We’ll need to eventually add in 11 electrons to match the 11 positive charges in the nucleus; sodium is thus chemical element number 11. The first electron ends up in an “orbit” or state called the 1s. One more electron can fit in this state, to give a atomic state we denote as 1s2, where the superscript “2” is counting those electrons. The next two electrons go into the state called 2s. Six more can go into three similar states all lumped as 2p. The eleventh and final electron goes into the 3s state. This is the state of lowest energy of the sodium atom in isolation… and that’s a common state for sodium that’s been wafted into the flame after the chloride partner gives back one electron to what started as a sodium atom missing one electron, an ion.

The flame is a state of high energy as disordered thermal energy or heat. Atoms and molecules in the flame bounce into each other with extreme frequency. Sometimes an electron on the sodium atom gets bumped up in energy from the 3s state to the 3p state. That’s not a stable state for various reasons. The electron can fall back to the 3s level. In doing that it loses a lot of energy. Ah, but energy is conserved! The energy is taken up in creating a particle of light, a photon. This photon, when it hits our eyes, gives us the sensation of yellow. There is an exact mathematical relation between the energy of the photon and its wavelength and, therefore, its color. (Light is a vibration of electrical and magnetic fields in space, as realized by the brilliant James Clerk Maxwell in 1860, and the idea carries into modern “quantum” physics, with interesting ties to the Nobel Prize for Albert Einstein! Light has a wavelength for its vibration, just as does sound or water ripples. There are lots of stories here.)

Let’s get some other colors: There are many metals that we can dissolve as salts and put into a flame. Each has its own electronic energy levels in both “ground” and “excited” states, and this gives their electronic transitions a special color. There may be several colors, with several transitions happening to

different atoms at the same time. To get nice, rather pure colors, we want the metal atoms to be combined with other atoms that don’t give another color to confuse the result. Many metals can be dissolved in, say hydrochloric acid to give chloride salts. Chlorine atoms don’t give light that we can see.

Let’s look at different metals, the colors they give, and the chemical compounds we can obtain and dissolve in water nicely. After this we’ll get back to the blues, yellows, oranges, and reds of common flames.

Element name Symbol Flame color Compound to use
Copper Cu Green Copper chloride or sulfate
Potassium K Violet Potassium chloride
Rubidium Rb Violet Rubidium chloride
Cesium Cs Blue Cesium chloride
Calcium Ca Orange/red Calcium chloride
Manganese Mn Lime green Manganese dioxide (see below) or nitrate
Lithium Li Deep red Lithium chloride
Iron Fe Orange Ferrous sulfate (ferric is insoluble)
Indium In Blue Indium chloride
Zinc Zn Aquamarine Zinc chloride or sulfate
Strontium Sr Red Strontium chloride or sulfate
Boron B Green Boric acid (borax is not as good)

The last element, boron, is not a metal, but it’s handy and it’s colorful, and the same ideas about electrons changing state apply. The particular salts to use, chloride or sulfates, are not critical; you might find some others, but avoid salts where the other part, the anion, imparts its own color that might mask the color you want. Obviously, avoid borates of the metals, or you’ll mostly see the green of boron.

Dissolve as much of a compound as possible. You’ll be using just a tiny amount sprayed into the flame, so you won’t waste much – and you can keep the solution and its solids for later, anyway. Some of these compounds are much more soluble than others. E.g., only about 6 grams of boric acid dissolve in 100 g of water, while 129 g of manganese nitrate will dissolve in 100 g of water! In any case, all the above are usefully soluble.

Getting these chemicals and using them safely: Some of these are easy to get and cheap, others are more specialized. Start with the easy ones:

* Copper: copper sulfate is sold as a root killer in garden or hardware stores (it kills roots that invade your oudoor plumbing. Cheap. Copper sulfate is toxic in fairly small amounts, even 1 gram. Don’t let anyone taste the pretty blue crystals!

* Sodium: this is ordinary table salt. Super cheap.

* Potassium: pharmacies and supermarkets sell potassium chloride as a “salt” substitute for people with high blood pressure. Make sure it has no sodium chloride at all, or the sodium color will dominate. Cheap.

* Calcium: Calcium chloride is sold in big bags to melt ice in cold climates. It is also sold in small amount, rather pure, for making some cheeses and can be bought online.

* Manganese is in alkaline batteries. You can cut an old battery open (careful with the sharp edges!). However, the manganese is as the insoluble dioxide. To make a soluble form, you can dissolve a pinch of the dioxide in a pinch of hydrochloric acid, HCl, also sold in hardware stores as muriatic acid (from the Latin muria, brine, since the chlorine is made ultimately from sea salt). BE CAREFUL; HCl is volatile, so that HCl gas wafts off the liquid. Its suffocating odor is a deterrent; its effect on lungs is terrible. Don’t breathe over it, and discard any leftover acid (in small amounts) by diluting it with lots of water.

If you can get ahold of manganese nitrate, you’re set, without any processing.

* Iron: You can get essentially pure ferrous sulfate as “iron pills” at a pharmacy or supermarket. They’re sold to treat iron deficiency in humans. Note: While iron is a critical element in our nutrition (usually obtained from food), an excess is toxic and even deadly, as it drives the destruction of organs. The most common accidental poisoning of children is from their naïve consumption of iron pills. Take care.

* Boron: boric acid is sold as a roach and ant killer. Get the pure stuff, not mixed with other chemicals. It is toxic to humans, too, at the level of a few grams. Don’t let anyone taste it!

The other chemicals are less available. Get your friendly local university chemist to give you a few grams, or have him or her do those demonstrations. You might also get them from a chemical supply house or Carolina Biological Supply.

Controlling the torch flame:

Why was the butane flame blue and orange to start with? Combustion of a hydrocarbon such as butane is a very complicated set of chemical reactions, all going on at the same time in a very short time as the butane and its products shoot out. The combustion is always a little bit incomplete, creating chemicals that have their own glow or luminosity. Very incomplete combustion, similar to that in a candle flame with its low temperature, creates balls of mostly carbon, called soot. When in a flame, they glow from what’s called blackbody radiation (the name has a long and fascinating history, even involved with Nobel Prizes). This is radiation of all wavelengths or colors. Its intensity rises with temperature. Its color changes with temperature, from red at low temperatures on up to blue at temperatures of stars, far higher than in any flame. To prevent the orange glow from masking the colors of the metals that you want to see, adjust the torch flame so it burns blue.

Finally, why is there blue in the torch flame? This color comes from some unusual and unstable chemicals forming in the flame. One such chemical is the radical CH, one carbon and one hydrogen bonded together. It’s very unstable and gets burned up eventually, but not before it glowed. Another compound is C2, just two carbons bonded together. Same deal – it’s unstable and it disappears, but it did glow on its way out.
 

spontaneous ignition

PICTURES COMING SOON

Spontaneous ignition: the powerful oxidant (potassium permanganate and sulfuric acid) reacts with ordinary ethanol to create a flame without a match. A more dangerous demo, done in a safe area at a safe distance, is nitric acid as the oxidant in a shallow dish. Have an adult do the whole demo.

Equipment and supplies: potassium permanganate ($$, where), concentrated sulfuric acid (get a small quantity, say, 100 ml; $XX), ethanol (get a small quantity of denatured alcohol, perhaps at a hardware store; $10), big beaker (400 ml is good, from a chemical supply house or Carolina Biological Supply; $5), 2 smaller beakers for the acid and the alcohol (50 ml each, $6), eyedropper

Precautions: foremost, only have an adult who knows chemistry to the demo. Have on hand baking soda (better: commercial acid neutralizing powder) to neutralize spilled acid; wear gloves, goggles, and a lab coat; prepare to wash exposed flesh with water copiously, as at a wash stand; run the demo on an acid-resistant counter. Concentrated sulfuric acid is an extremely corrosive liquid. It attacks flesh, even charring it if it is in contact form more than a few seconds. It also reacts vigorously with water. A dollop of water put into the acid creates so much heat that the water vaporizes into steam and splashes the acid around. Never add water to sulfuric acid; add acid to water, if you must.

On to the fun

We’re going to mix beautiful purple potassium permanganate with sulfuric acid to make a very strong oxidizer. When we drip ordinary alcohol onto it, the alcohol bursts into flame every time. We’ll look at why this happens.

Here’s the chemistry of it all: Potassium permanganate has the formula KMnO4. It has the most oxygens that can fit around a central atom and it can readily release those oxygens for a chemical reaction. Other compounds with so much oxygen are similarly powerful oxidants – perchloric acid (HClO4), osmium tetroxide (OsO4), potassium dichromate (K2Cr2O7) are among these.

Oxidation is defined accurately and inclusively as the extraction of electrons from a fuel. In ordinary combustion the chemical species that pulls off the electrons is oxygen. Since we’re considering the combustion of common alcohol (ethanol, C2H5OH) as the fuel, let’s look at the overall reaction of alcohol burning in air. The oxidant is then atmospheric oxygen, O2. All the carbons become carbon dioxide, CO2, and all the hydrogens become water. For complete combustion the summary is

To start this reaction at room temperature, we need a source of ignition. It can be the hot flame from a match. It can be a strong electrical spark. There has to be something that starts tearing apart some of the ethanol molecules into pieces that readily undergo further chemical reactions. The whole process of burning to CO2 and water is quite complex.

There’s more to it. The reaction only keeps going if the heat that’s liberated by burning some of the fuel is effective in heating the next “batch” of fuel. Liquid fuels such as ethanol spread out the heat well, so that it’s hard to keep the flame going unless the alcohol itself is warmed. You can’t make a flambé dinner entrée with cold cognac or rum as the source of alcohol.

This reaction is different. We have to add the very strong acid, sulfuric acid, H2SO4, which turns the potassium permanganate into the potent oxidant MnO4, a free proton H+, and potassium sulfate. The permanganate ion, MnO4, readily provides all its oxygens for oxidizing the alcohol, becoming reduced itself to the state called manganous; the manganous ion is formally written as Mn2+. We can look at it as if manganese started with 7 positive charges and ended up with 2 positive charges by taking up electrons from the fuel.

Running the reaction: We start with potassium permanganate on the bottom of the large beaker. A convenient amount is 5 grams; you can weigh it out on a small laboratory scale or you can just use ½ teaspoon. If the crystals are coarse, you should grind them to a powder, which is easy using a mortar and pestle (again from a chemical supply house, or even a kitchenware store). Make it aggregate into a pile rather than spread out over the bottom of the beaker, such as by tilting the beaker. Add a similar volume of the concentrated sulfuric acid. Take great care to avoid spills. It’s convenient to pour from the bottle of acid into a small beaker and then from the small beaker into the big beaker with the permanganate crystals. Don’t use too much acid or the reactive “paste” will be too diluted with acid, which is not the primary reactant.

Pour a few milliliters of ethanol into a small beaker. Draw a few ml into the eyedropper. Hold the eyedropper over the acid/permanganate paste and release a single drop. It will burst into flame. The permanganate ion reacts so rapidly with ethanol that the heat builds up very quickly, making the ethanol and acid mixture very hot. It’s akin to lighting a match. Aiding the rapid heat build-up is the sheer density of the oxidizer; the alcohol is exposed to all that oxygen in a small volume.

Connection to rocket flight: The reaction is termed hypergolic, or hyper-energetic, from the German hypergol. The erg in that word refers to work (Greek ergon), also construed as energy. Some rocket engines used hypergolic propellants that burst into flame on contact in the combustion chamber. That made engine starting more reliable. Modern high-performance rockets such as NASA’s Delta rockets, the Russian Proton rockets,, or the Space-X Falcon use “safer” fuels such as liquid oxygen and kerosene; ignition is done with technical expertise.

A note on color and physics: The permanganate ion is one of the most intensely colored substances known. It colors water a deep and beautiful purple, even at very high dilutions. Permanganate is an exceptionally strong absorber of light – almost all across the colors in the spectrum, leaving only a bit of the red and blue, making purple. Try adding a few grains to a beaker of water. Note that handling the solid with your fingers will leave you with a strong purple stain, which slowly changes to a rather permanent brown stain as the permanganate oxidizes your skin oils and becomes the insoluble manganous oxide. Wash off any permanganate stains quickly. The same staining will occur on other surfaces, such as your clothing; take care.


remotely relighting a candle

IMAGES COMING SOON

Relighting a candle, remotely, is simple to do, but the physics and the chemistry of it has some real details. Here’s the link for this simple but intriguing item.

Relighting a candle, remotely

Equipment: A candle; matches- that’s all… all in a room without air currents (no fans, drafts, etc.)

That it works is simple to show: Light the candle and get a reasonably good flame going, not a small one. You may need to let the candle melt a fair-sized pool around the wick and then pour out some of the wax (not on the rug or tablecloth!). You want a length of wick above the liquid wax to be a bit long, even a centimeter (a bit less than ½”). Snuff out the flame rapidly. I do this put closing my two fingers on it and quickly letting go; don’t encourage young children to do this, as they might get a small blister. You can use anything else that closes on the flame and opens again quickly, or even a very short puff of air, though it often defeats the effect. At least blow through a straw rather than starting a big movement of air with a breath. The wick will now emit a wisp of vaporized wax and the breakdown products of wax. Quickly have a lit match ready. Go some distance up this stream, which may even reach 4 to 6 cm (about 1-1/2 to 2-1/2 inches) in good cases. Move the match flame into the stream and the stream will catch fire. It burns back to the wick and relights it!

VIDEO and some frame grabs

How it works: Candle wax is a complex chemical mixture, mostly long chains of molecules made of just carbon and hydrogen called hydrocarbons. You can’t light wax just by getting a flame near it. You need to heat it until its molecules both vaporize and partly break down into small molecules. The candle flame is constantly doing that. The small molecules, especially when they are hot, readily catch fire. That’s what’s in the smoky stream. You can also see that a flame in a flammable mixture (the vapors and the air mixed in them) readily propagates from its hot end toward any further supply of the mixture – here, toward the wick (as well as upward, though that’s less obvious as you’re focused on the downward burn). The rate of spread of the flame is faster with higher temperature, though you can’t affect that very much in this setup.

Question to ponder: Why does the vapor trail from the extinguished wick stay together in a narrow stream? Why doesn’t it just spread out and become ineffective in letting the flame jump back to the wick? Let’s call the stream a self-organizing system. Its heat content generates a pattern of flow in the surrounding air that surrounds the vapor stream tightly and also helps move it up.

flash paper

MORE PICTURES COMING SOON

Paper that burns in a flash before it hits the ground: making flash paper with care: Take paper that’s really pure wood fiber (cellulose); react it with nitric acid to replace parts of the molecules; wash it and dry it. Put a match to it and it disappears in a rapid flash, leaving no ash. Make a flaming paper airplane! Dangerous chemicals, but it can be done safely. Here’s the link to the story.

Paper that burns in a flash before it hits the ground: making flash paper with care: Take paper that’s really pure wood fiber (cellulose); react it with nitric acid to replace parts of the molecules; wash it and dry it. Put a match to it and it disappears in a rapid flash, leaving no ash. Make a flaming paper airplane! Dangerous chemicals, but it can be done safely.

VIDEO, incl. new one

Equipment and supplies: High-quality paper without clay sizing to make it shiny – that is, white paper towels; scissors to cut the paper towels; a graduated cylinder (100 ml capacity; $12) is handy to measure out the acids; concentrated sulfuric acid ($20-44, from a chemical supply house or, say, Carolina Biological Supply); concentrated nitric acid (ditto); 3 shallow glass bowls, about 15 cm (6”) diameter (kitchen bowls are OK; they will not be harmed); pitcher of water; plastic tongs to handle the treated paper; a watch to time the treatment; an acid-resistant surface on which to carry out the treatment; protective equipment – see below.

Precautions: Only an adult with a good knowledge of chemistry should run this demo. both of the acids are dangerous, sulfuric especially so; it will cause severe burns to your skin, even charring it. It will corrode many surfaces. Treat sulfuric acid with extreme respect. It also reacts vigorously with water. If you add water to concentrated H2SO4, the water will get so hot that it flashes to steam, spattering acid all over. Never add water to sulfuric acid; only add acid to water, with care. Nitric acid by itself is not quite as corrosive but it will turn your skin yellow quickly. The vapors of nitrogen dioxide above the acid are very corrosive and damaging to your nose and lungs. Don’t breathe near the open bottle of nitric acid. The combined sulfuric and nitric acid creates the nitronium ion, some of which appears in vapor above the mixture. Never breathe near the reaction bowls, and be sure to have good air circulation. The mix of acids creates the nasty nitronium ion that appears above the bowl. Prepare for accidental spills; have baking soda, or, better, commercial neutralizing powder on hand. Wear full protection – gloves, goggles, and a lab coat. Have water on hand in good quantities to wash off any acids. All this said, with care the treatment can be done safely.

What we’re doing: We’re going to alter the cellulose molecules with nitro groups NO2, as internal sources of oxygen (and nitrogen) for really fast combustion – so fast that the flame spreads internally at high speed, maybe one second to burn up a square of flash paper 6 cm (2.5”) on a side. The details of the chemistry are added at the end of this write-up, for those of you who want to know.

Preparing the flash paper, which we can call cellulose nitrate or nitrocellulose. Sounds a bit like trinitrotoluene (TNT) with that “nitro” in there, doesn’t it? It should; it’s also a possible explosive, but don’t worry; that won’t happen in open air. The effect is still surprising.

* Get all your protective gear on, and the same for onlookers.

* Prepare the paper toweling: cut it into squares about 6 cm (2.5”) on a side. Keep them dry. Make anywhere from 3 or 4 to about 10 to 15.

* Set out 3 glass bowls and fill two with water.

* Have ready: the plastic tongs, a watch to time 2 or 3 minutes, and a bunch of paper towels that you’ll use to dry the treated papers.

* In one of the glass bowls, pour concentrated nitric acid into the graduated cylinder to about the 50 milliliters (ml) mark. The amount is not all that critical. Pour this into one of the glass bowls. This must be the first acid put in; it cannot be the sulfuric acid.

* Use the graduated cylinder to measure out about 50 ml of concentrated sulfuric acid. You could be very attentive and use a new graduated cylinder or else clean and fully dry the one graduated cylinder, but it won’t matter. Pour the acid into the bowl with the nitric acid – slowly, and letting the mix cool if need be so that it won’t boil.

* Here’s the repeated treatment:

* With tongs, slip a single square of paper towel into the acid mixture.

* Let it sit for 2 to 3 minutes, then use the tongs to take it out, letting the acid drip off as much as possible.

* Slip the treated paper into one of the bowls with water. Move it around for about 15 seconds.

* Move it to the second bowl and do the same. Now it should be pretty well rinsed of acid.

* Dry the paper square well between folds of a big square of paper towel.

* Remove it from the paper towel and let it air-dry.

* You can speed up the process with a hair dryer or a warm electric hot plate, but you may get a real surprise: it may flash into nothing before your eyes if you get it too hot, and “too hot” is still way below what sets ordinary paper to even charring.

The ignition: You can do this lots of ways. You can hold the flash paper with tongs or tweezers or whatever and light it at the far end of the square. The burning will be very fast. You can’t let it go from the tongs fast enough that it will hit the ground before it finishes burning. Like some magicians, I like to hold the flash paper by finger and thumb at a corner and then have someone with a match light the match and touch it to the far corner. I let it go as fast as I can and the paper finishes its yellow flash after it has dropped only a foot or so! Note that you can get a hot finger if you wait too long to let it go. However, the mass of burning matter is very small, so you are unlikely to get any notable burn. Be warned, however. I know how to do this, and you may find you need some practice after watching an expert. We’ve also folded the square into a tiny paper airplane. We’ve lit it from the front and thrown it forward as fast as possible. It makes a show that we’ve caught with a high-speed camera. The image is fuzzy, with very low spatial resolution. We made it with a Casio Exilim Z-10, alas, no longer made. It can do 1000 frames per second! Even 240 frames per second is good, if you get some SLR cameras or a Go-Pro.

VIDEOs again

The chemistry

Cellulose is a polymer of the ordinary sugar, glucose. That is, glucose molecules link up end-to-end with the elimination of a water molecule at each link, making a strong and stable molecule (so stable that only bacteria digest it; even cows need bacteria to do it for them). Cellulose can burn, as in a wood fire, but slowly. Lots of oxygen has to reach it from the air to carry out the full combustion reaction, and that’s rather slow compared to what we’re going to do. We can write the chemical formula for cellulose as (C6H10O5)n, where the ”n” means that it’s repeated “n” times; the number “n” is in the tens of thousands.

The “stick formula” for cellulose, which doesn’t show the real spatial orientations of the atoms but which shows who’s connected to whom is

The reaction for combustion in air we can write for each set of two subunits as

We’re replacing many or most of the hydroxyl (OH) groups sticking out, 3 per glucose, with nitro groups:

The reaction occurs at each OH group. Now we have a lot of oxygen in the molecule, plus some nitrogen, which also liberates a lot of energy in the final reaction.

The final molecule looks like this

Hold on: the sulfuric acid doesn’t appear in the product. What is its role? Foremost, it strongly ties up the water molecules generated by the reaction of nitric acid. That prevents the water from accumulating and discouraging the continued liberation of more water. The very high acidity of sulfuric acid also activates the nitro group in nitric acid to chemically attack the hydroxyl groups of glucose.

Now the formula for its combustion can be written in two ways, though the reaction is some mixture of the two paths. If there’s lots of air with oxygen around, the carbons all burn to CO2 and the hydrogens all burn to water; that releases a lot of heat energy. The nitrogens combine with each other to make the strongly bonded N2 molecule, also releasing a lot of energy. We can write the reaction, per 4 units of glucose, as

If nitrocellulose (what we’ve made) combusts with no outside oxygen, there’s only partial oxidation of carbon to CO2, the rest ending as carbon monoxide, CO. That’s still a big energy-producer; the triple bond is the strongest bond in nature. The whole reaction looks something like

Reality is messier. We rarely get full conversion of the OH groups to nitro groups; the reaction of “self-combustion” will not go exactly to completion, possibly leaving minor chemical species, even H2. In any case, we get a fast reaction in air, and a real explosion in a closed container.