Seeing in the thermal infrared

Let’s “see” thermal radiation, and see who’s (what’s) how or cold, and why. You’ll need a thermal imager that you can attach to your smartphone. It’s a bit expensive but it offers a lot of learning and even utility around the house to find heat or water “leaks.” Shiny metals and the clear sky both offer some real surprises.

The clear sky is so cold! Read temperatures at a distance, and with surprises.

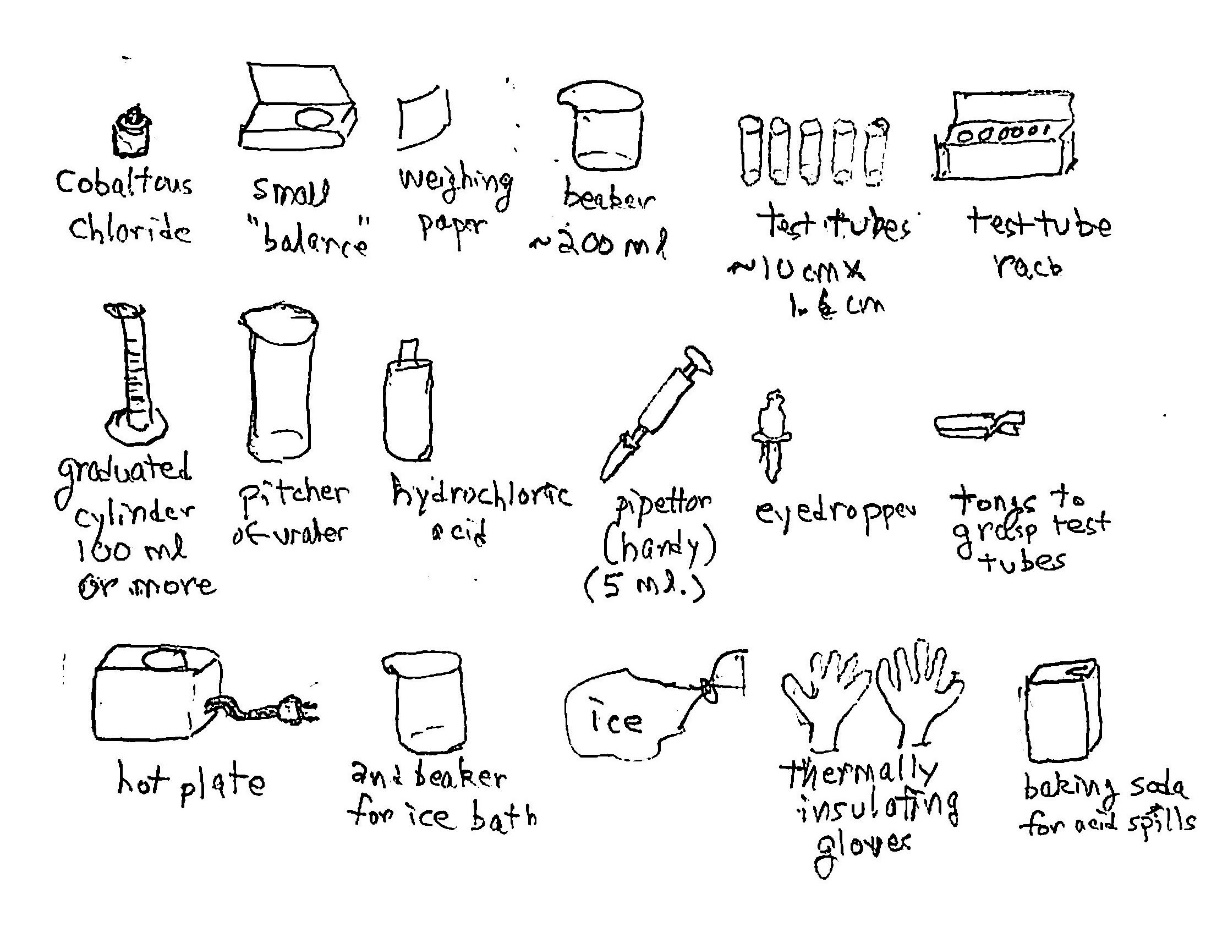
Equipment: simple, except for one expensive infrared imager (ca. $400)

You can look at the temperature of things – your arm, a chair, a puddle of water, a piece of hot sunlit metal, even the sky. Here are two images we’ll look over in a bit:

Grab from science 2021-22

You can look into reasons why different objects attain different temperatures, and even why some objects seem not to register their “correct” temperature. We can take a picture of an object or even a whole scene and see the different temperatures of all the parts.

This is a demo that’s best done with a thermal imaging camera, not a common device, but you may find a scientist willing to do the demo. I have a FLIR ONE PRO, which is a small device that attaches to a smartphone, in this case, my Android phone. The FLIR has two imagers, one a standard light-sensitive camera and the other an array of 19,200 tiny bolometers that are sensitive to thermal radiation focused onto the array through a separate lens made of light-opaque germanium. The two imagers look at the same scene and are close enough to see overlapping images, one in the visible spectrum and one in the thermal infrared. The thermal infrared or TIR is a range of electromagnetic waves that are less energetic and of longer wavelength than ordinary light. Ordinary visible light is composed of waves with wavelengths of between 400 and 700 nm (nanometers, billionths of a meter), or about 1/100 the diameter of human hairs. Thermal infrared has much longer wavelengths; the FLIR captures waves between 8 and 15 μm (micrometers, millionths of a meter). That’s about 20 times longer than visible light, and carrying about 1/20th as much energy as sunlight’s particles of light or photons. That’s appropriate, since the energy of thermal motion at Earth’s conditions (a temperature of about 20°C or 68°F) is about 1/20th of that on the Sun, which is about 20 times hotter in absolute temperature (see below).

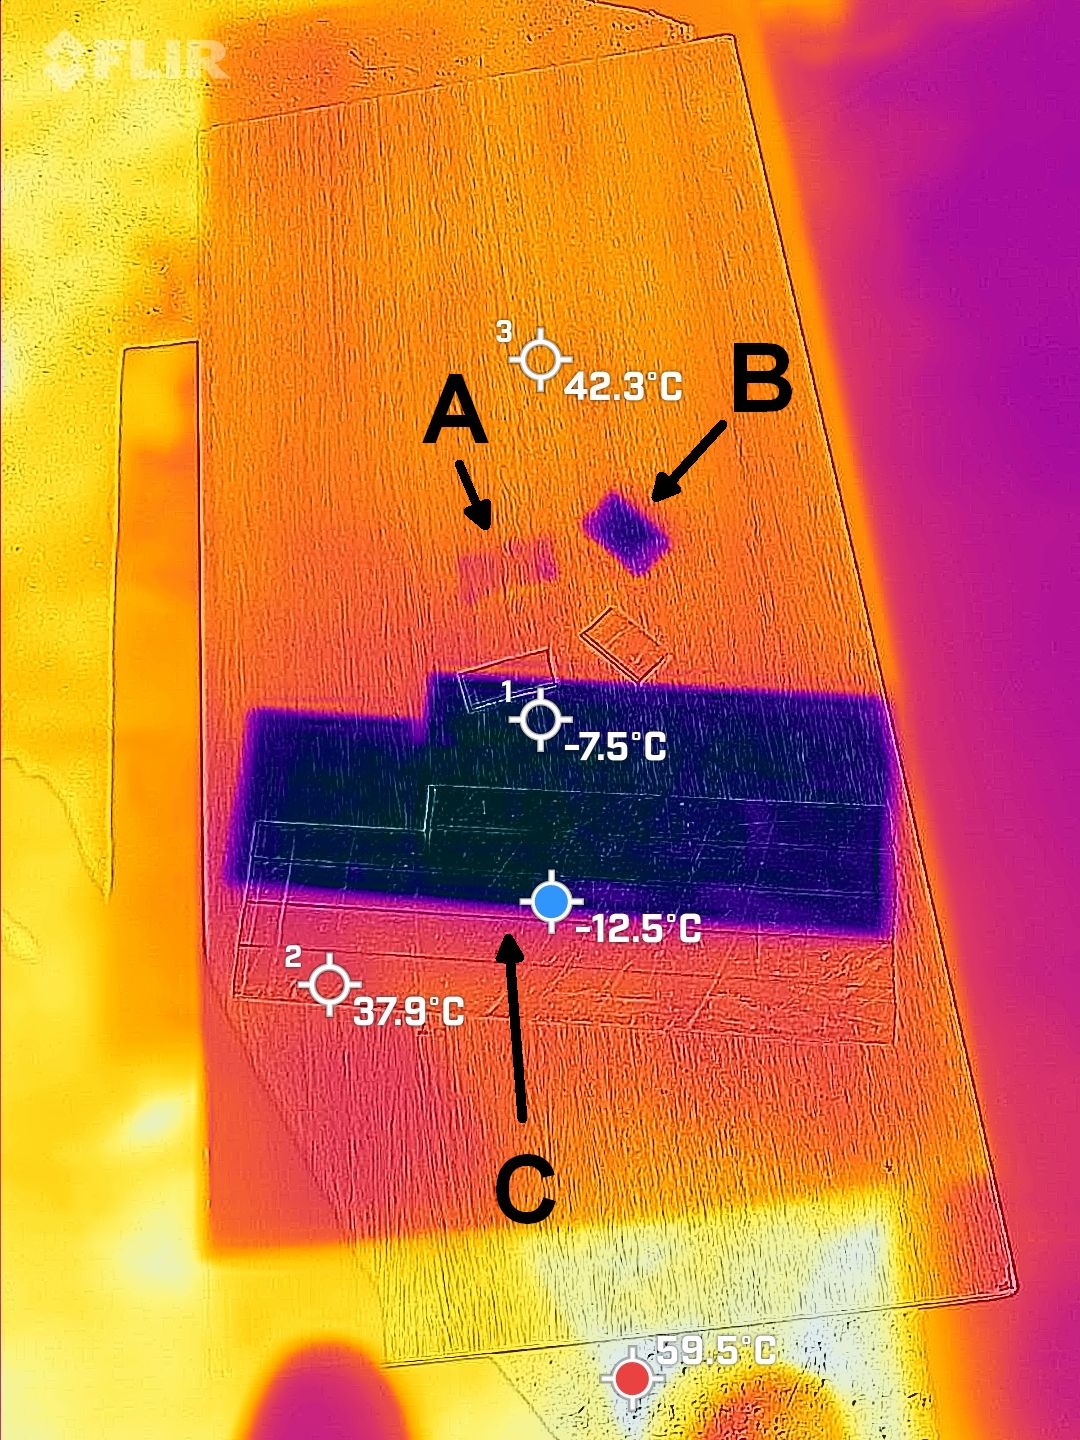
The core idea is that every object, even gases in the air, give off TIR at a rate that is proportional to the fourth power of their temperature on the absolute scale. The absolute scale is measured from absolute zero, where thermal motion stops (and only quantum mechanical zero-point motion remains – and interesting topic). Scientists use the Kelvin scale, which starts at -273.15 degrees Celsius; the freezing point of water on that scale is then +273.15 K (Kelvin, not degrees Kelvin). An increment of 1 K is the same as 1 degree Celsius (1°C). In the US (almost only the US!) people tend to use the ancient Fahrenheit scale, which we’ll peek at now and then. OK, let’s compare two bodies on Earth: a tree near you at 20°C or 68°F, and your face at a comfy 33°C (91.4°F). The absolute temperatures are 293.15 K and 306.15 K. The ratio of their fourth powers is (306.15/293.15) to the fourth power, which is 1.19 – that is, an area of your face gives off 19% more TIR than the same area of leaves. The FLIR detects these differences as signals that get converted to digital signals; the FLIR software processes these signals to temperatures that get presented as different colors. You can choose the color scale, with a common one being red for hot, through orange, yellow, green, to blue (as continuous hues or colors). That’s a nice picture each time. You can set the FLIR to present numerical values of the temperature at selected sites in the image.

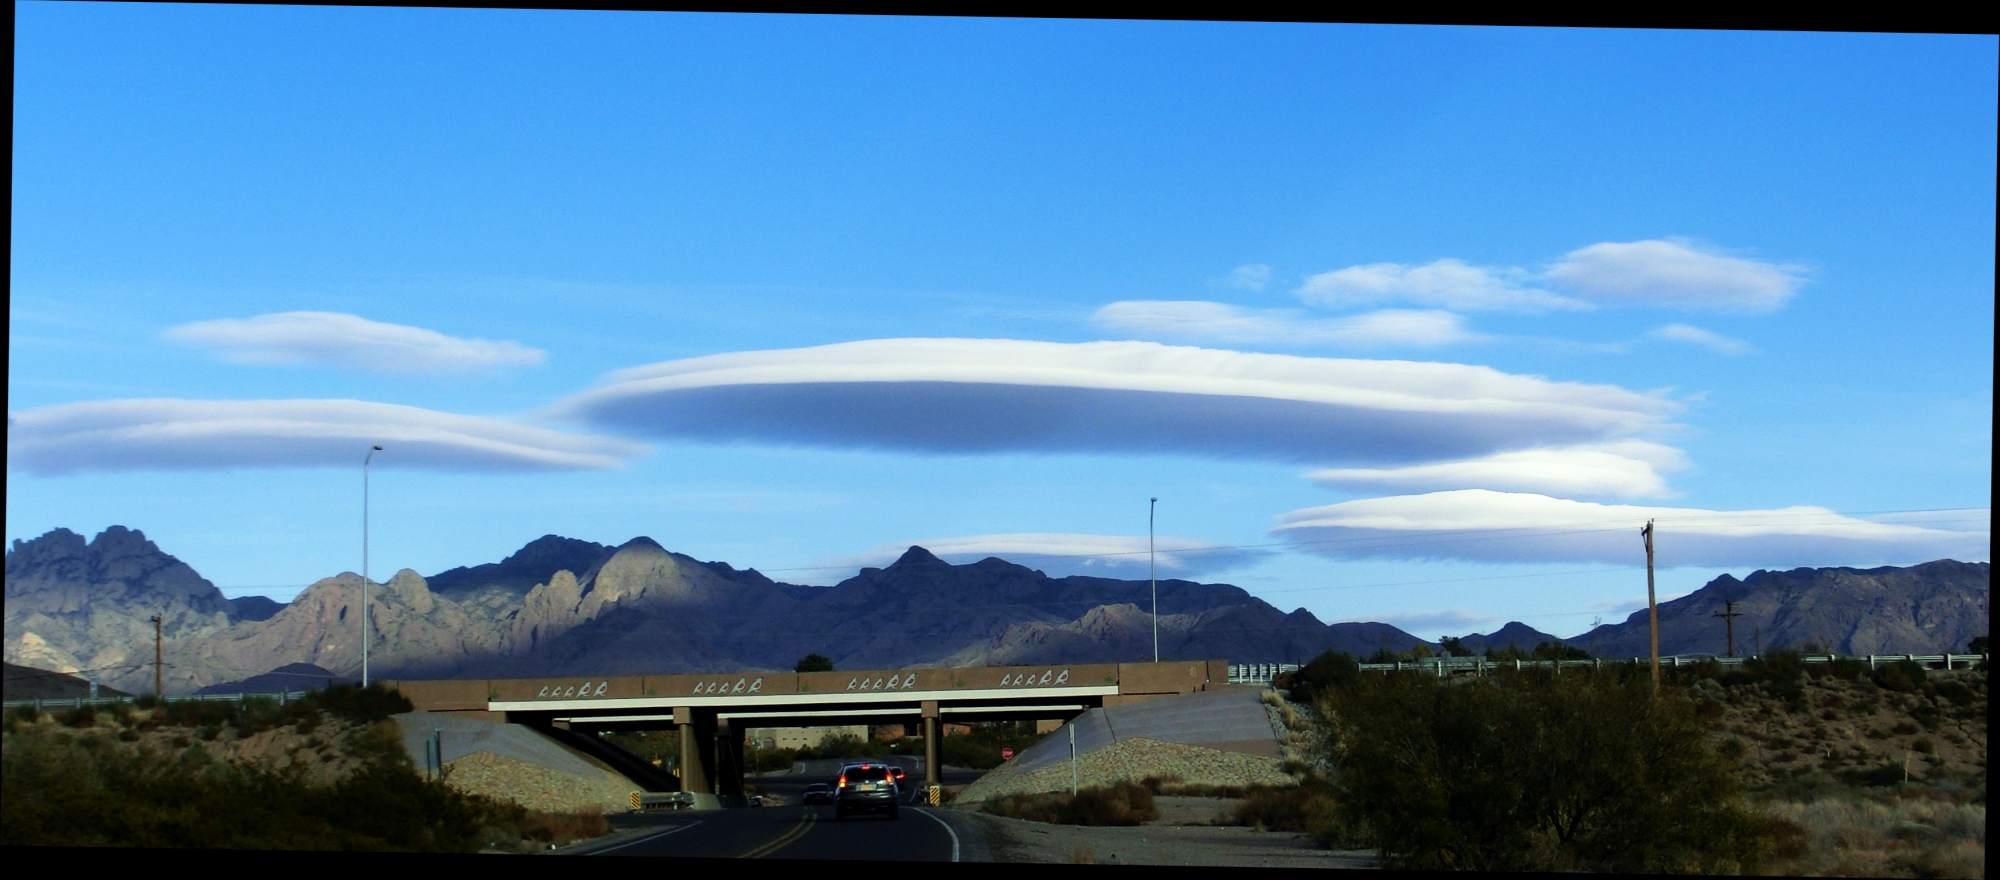
There are some very amusing scenes to image, such as a person with hot, dark clothing and maybe a cool forehead just wiped with a wet towel and eyeglasses that stand out frames vs . lenses. I presented two scenes earlier that are also very informative. One is an image the includes a person, some shrubs, some soil, and a bit of sky. The person is warm, the sunlit soil is hot – it absorbs sunlight well and can’t shed heat very well to the air. The shrub stays cool as air flows well over its small leaves, taking away much heat deposited by sunlight. The sky looks cold, and it is. Let me explain. The air is at a mild temperature, about that of the shrubs, but air can’t radiate TIR well. The major gases, nitrogen and oxygen, are extremely poor radiators, for reasons that lie in the wonders of quantum mechanics. The only good radiator in the air is water vapor, and there isn’t much of it in the dry time that this picture was taken in Las Cruces, New Mexico (we are in the USA, though many people don’t know it). So, little TIR energy arrives at the FLIR thermal imager and it registers a low temperature. We often see sky “radiative temperatures” that are 40°C (72°F) below air temperature! There are interesting consequences. On a clear night we cool to the sky but get very little TIR back from the sky. Our bare heads feel colder than they “should.” This imbalance in radiation affects plants, too. On a night with air temperature just above freezing the plant’s leaves cool by radiation enough to get below freezing. That’s called a radiation frost. Farmers are well aware of it.

The second scene shows interesting properties of shiny metals such as the aluminum here. Those metals don’t absorb too much sunlight because they are so reflective in visible light. However, they do get very hot because they can’t unload that little heat energy very well; they have a low “thermal emissivity” or ability to emit TIR. Anyone who left a shiny tool in the sun knows the result! Shiny metas are about the only common objects that have this low emissivity. We can “trick” them into emitting TIR well by giving them a thin coat of something that emits TIR well. I coated one strip of aluminum with nail polish, and it stayed cool. Maybe backyard mechanics should buy some nail polish for their tools!

So, this is a long demo. You can make it into a series of real experimental tests if you think about it. Good luck.


a chemical changes color with temperature

PICTURES ARE COMING

Hot = blue, cold = pink. How does that happen in a simple solution? The metal cobalt dissolved as an ion can take on different colors. It depends on which other ions surround it. We can change that by adding acid or adding water… and, surprisingly, just by warming or cooling a balanced solution. Get ready for some chemistry and a story about energy.

Change a solution from pink to blue and back – just cool it or heat it

Equipment and supplies: Here is a pictorial list

Costs: Labware is something you’d like for many demonstrations and experiments: small balance (properly called a magnetic force balance or scale; $20); weighing paper ($3; use smooth paper, in a pinch); beakers, in several sizes ($5 each); test tubes in one or more sizes ($1 each); test tube rack ($5); graduated cylinder ($10; get glass, not plastic); pipettor ($100, with tips; very useful; in this demo you can just pour carefully, but it’s tedious); tongs for test tubes ($2); hot plate ($80 or more; get a stirring hot plate and some Teflon-coated stir bars); thermally insulating gloves ($12)

Specific to this experiment: cobaltous chloride ($21 at Carolina Biological Supply for 100g, which is a lot)

Precautions: Cobalt compounds are toxic, so don’t expose yourself to them; they can be absorbed through the skin; use gloves. Hydrochloric acid is very corrosive, and the gaseous form of HCl is very noxious and can damage your lungs and eyes. Take care with the heated solution and especially with the hot plate. Have an acid neutralizer such as baking soda handy to take up acid spills.

Picture of two states

Many chemicals have intriguing colors or beautiful colors. There’s the deep purple of solutions of potassium permanganate, the violet sheen of iodine crystals, the gold of iron pyrite. Most colors are unaffected by temperature, but here is a fascinating and instructive case.

The chemical state of metal atoms in solution: Most metals can be nicely dissolved, especially in acids. The atom of the metal loses one or more electrons, becoming a positive ion; one electron lost 🡪 singly charged ion, such as the sodium ion, Na+; two electrons lost 🡪 doubly charged ion, such as the ferrous ion, Fe2+, or, for this demo, the cobaltous ion, Co2+. Many metals have multiple possible state, including cobalt as the cobaltic ion, Co3+, which we’ll leave here.

We often look at metal ions in solution. They must be accompanied by positive ions of equal charge in the whole solution; it’s possible to calculate the force of electrical repulsion if the charges aren’t balanced, and in a tiny amount of solution the forces are akin to nuclear weapons. In aqueous (watery) solutions, the Co2+ ion gets surrounded by a number of atoms or molecules. Some are right on the ion, as things called ligands (“tied”) and others sit outside this coordination shell as counterions that balance the total electrical charge to zero.

Ions moving between two states: In this experiment, we put the ion in a solution with chloride ions. There are two well-defined states. In one of them, which we can call water-complexed, the surrounding molecules are all water molecules. We write its formula as [Co(H₂O)₆]²⁺. It has two positive charges, so that there must be two negative charges right outside – in our case, as two negative chloride ions, Cl. The other state has four negative chloride ions on the cobaltous ion. We write it as [Co­Cl4]²⁻. It has two negative charges, so that there must be two positive hydrogen ions right outside, (overly)simply written as H+.

We got all this stuff into solution by dissolving cobaltous chloride in water and then adding hydrochloric acid. We’ll play with which ligands, water or chloride, get preference around the cobalt, by adjusting the concentration of acid and the temperature. Cobaltous chloride comes with water attached, as CoCl2◦6H2O. We add hydrochloric acid, HCl, in the right amount to get the cobaltous ion poised between its two states. (Side note: hydrochloric acid is properly the solution of the gaseous molecule HCl in water, but we’ll use common shorthand.)

Making the solutions: Fill a graduated cylinder (tall container with volume markings) with pure water to the 40 milliliter (40 ml) mark. Pour it into an ordinary beaker (that’s the straight-sided cylindrical container with a pouring lip). Weigh out 4 grams of cobaltous chloride and add it to the water. You’ll get a rosy red solution. Label it as, say, Col2, for short, and also label it as toxic. [The 4g here would be enough to make an adult quite sick and could kill a very small child. As all organisms, we need cobalt in the form of vitamin B12 but a tiny excess is harmful.] Now measure out 60 ml of concentrated hydrochloric acid, CAREFULLY. HCl is dangerous and must be handled with great care. It is not simply an acid that can corrode things. The HCl gas coming off the acid solution is suffocating and quickly damaging to lungs, eyes, etc. Do not breathe near the solution. Add the HCl to the cobaltous chloride solution. You’ll get a nice violet solution. Divide this solution into 5 or more test tubes for a series of demonstrations.

Demo 1: Swapping water or chloride ligands for changing colors: Take two test tubes that each have some of the original solution. Drop water into one solution and swirl it well to mix after each drop. Keep adding water. At some point the solution will turn a definite pink. You’ve now created the water-complexed state as the dominant form. In the other tube add drops of HCl with mixing. It will eventually turn a definite blue, with cobalt in the chloride-complexed state. You can reverse the effects. Add HCl to the first tube and you’ll eventually get it to turn blue; add water to the second tube and you’ll get it to turn pink.

PICTURES

Demo 2: Balancing the complexes and pushing them to one side or the other with temperature: Fill a beaker with the original solution and add HCl dropwise with stirring until you get a nice intermediate violet color (if you overshoot, add a little water). This solution will be very sensitive to temperature. Divide it roughly equally into three test tubes. Prepare hot water, to boiling, in a beaker on a hot plate. Beware of getting your hands in the “steam” above the beaker. Also prepare ice water in another beaker, just by adding ice to water. Now place one test tube in the hot water, holding the tube with tongs or with waterproof thermally insulating gloves. It will turn blue, the color of the chloride-complexed cobaltous ion. Put another tube in the ice bath. It will turn pink, the color of the water-complexed cobaltous ion. Of course, you could do this with one tube, but it’s nice to see all three colors at the same time as a clear demonstration of the changes.

Move the cold tube to the hot water and the hot tube to the ice bath and they’ll both reverse their colors! You can keep reversing them.

PICTURES

What’s happening in demo 2: Both water molecules and chloride ions are hanging around the Co2+ ion in the solutions. Both bindings are happening all the time. At any constant temperature there will be a balance, an equilibrium with each state forming and breaking up. Which one dominates depends on the temperature. When chloride ions dominate, more energy is released as heat than when water molecules dominate. If we add heat by increasing the temperature we are counteracting the release of heat, pushing the balance or equilibrium back toward the original side. The counteraction of this chemical shift on the force or perturbation we apply is described as Le Chatelier’s Principle. We can look at the reversible process of changing which ligands are on cobalt as this balance or equilibrium:

Pink side: [Co(H₂O)₆]²⁺ +4Cl⁻ ↔ [Co­Cl4]²⁻ + 6H₂O₅ + liberation of heat: Blue side

The two-headed arrow indicates that both forward and backward changes occur.